
95+ 5-Star Reviews in the Central Virginia Area

How Many Christmas Lights For A 6ft Tree? (Guide)

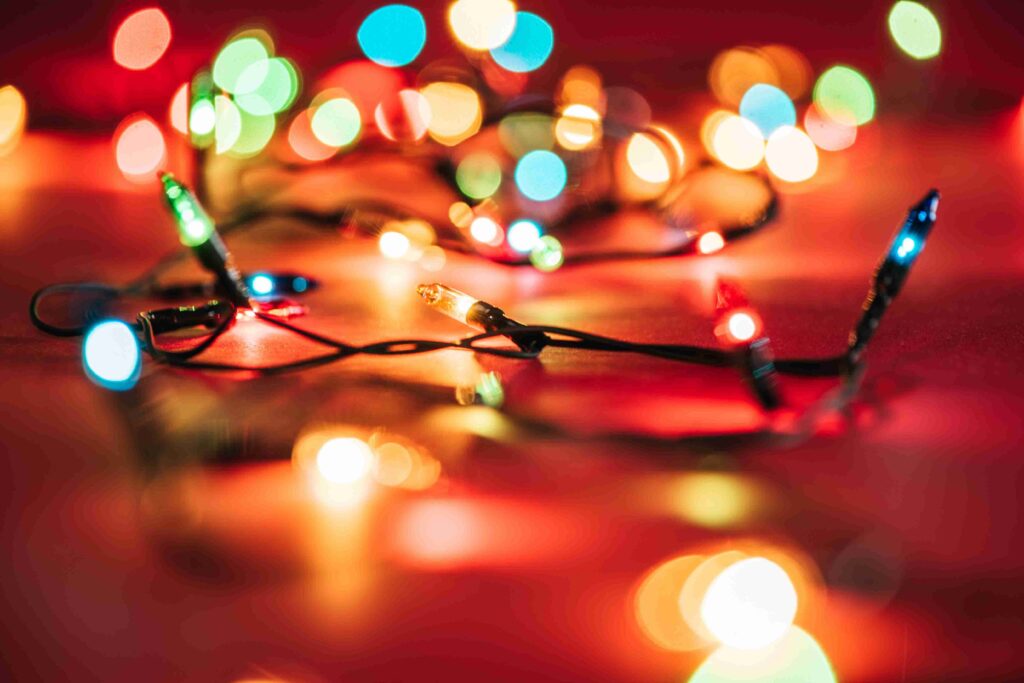
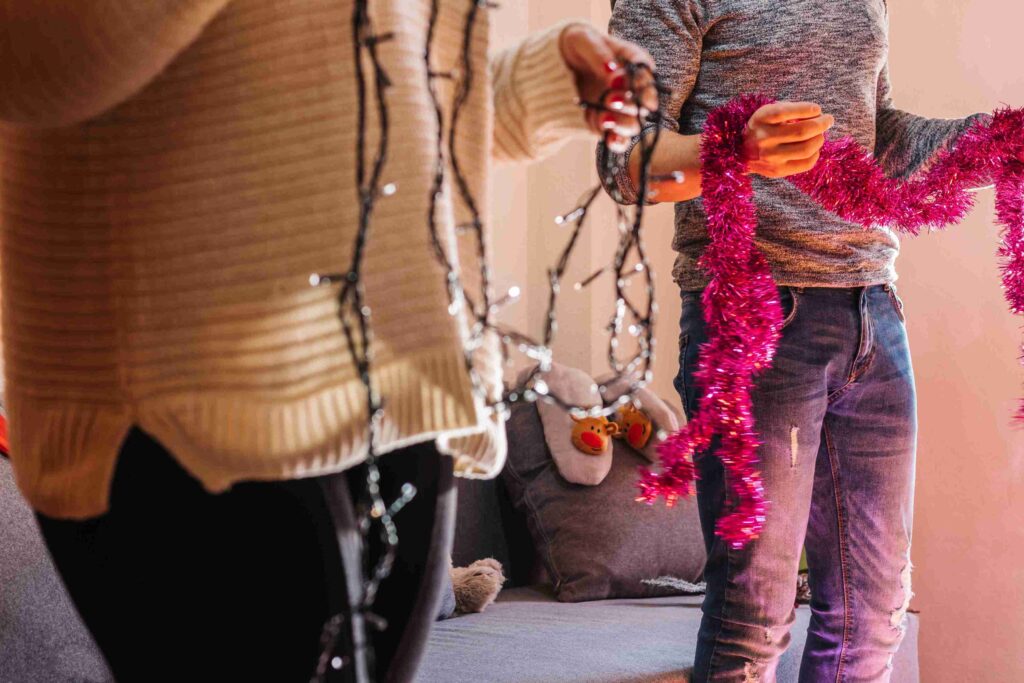
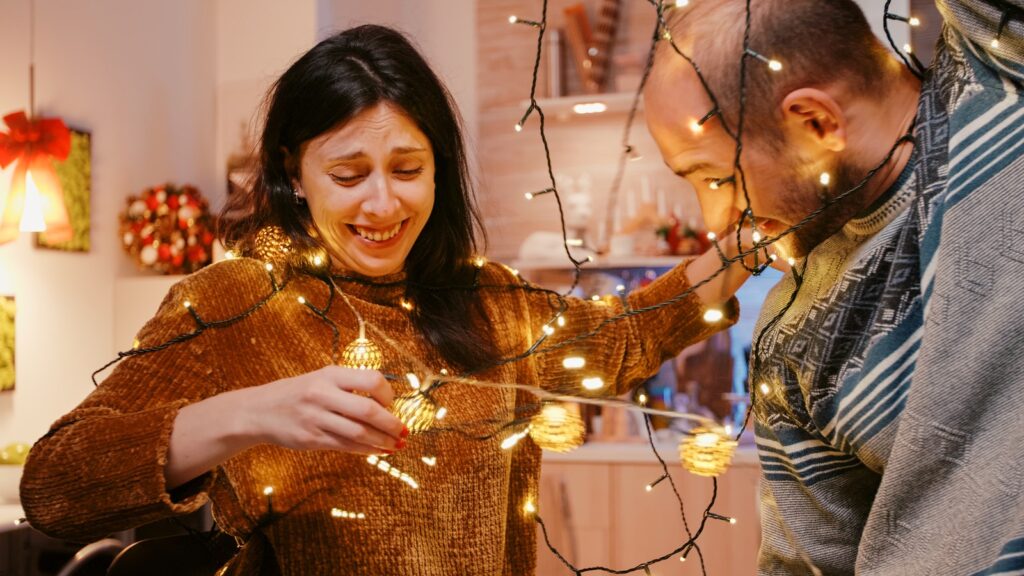
Decorating the tree is one of the best parts of Christmas. You put on some music, grab a mug of hot cocoa, and pull out the boxes of lights. 

Then it hits you – how many strands do you actually need for your tree? 

You don’t want it to look like a dark corner, but you also don’t want your living room glowing like a landing strip.

In this post, we’ll break down how many Christmas lights you need for a 6ft tree.

Average Number Of Christmas Lights For A 6-Foot Tree

You need around 600 to 900 Christmas lights for a 6ft tree.

If you like a simple, classic glow, stick to around 100 lights per foot which is about 600 total. It gives a soft, cozy shine that still feels festive.

For a brighter, fuller look, go up to 150 lights per foot, or roughly 900 lights

That’s the “wow” level most people like for living room trees.

If you’re going all out with a tree that could light up the neighborhood, aim for 200 lights per foot, which lands you at about 1,200 lights. That’s the kind of tree that looks straight out of a Hallmark movie.

Average Number Of Christmas Lights For A 6-Foot Tree

Also Read: Can Christmas Lights Catch On Fire?

Keep in mind, these numbers aren’t strict rules. Every tree’s a little different, and so is everyone’s taste. Some people like soft and minimal. Others love bright and bold. 

Start with a base number and adjust until it looks right to you.

Factors That Affect How Many Lights You’ll Need

There’s more to it than height. A few little details make a big difference in how your lights look once they’re on the tree. Let us explain:

#1 Tree Type

Real trees and artificial trees can look totally different once the lights are up. 

A real pine or fir usually has thicker, denser branches, which means the lights don’t shine through as easily. You might need more strands to fill in the gaps and make it sparkle evenly.

Artificial trees, especially the kind with evenly spaced branches, tend to reflect light better. You can often get away with fewer lights and still get a bright, balanced glow.

Also, if your tree is super full and bushy, add more lights. 

If it’s slimmer, you can cut back a bit.

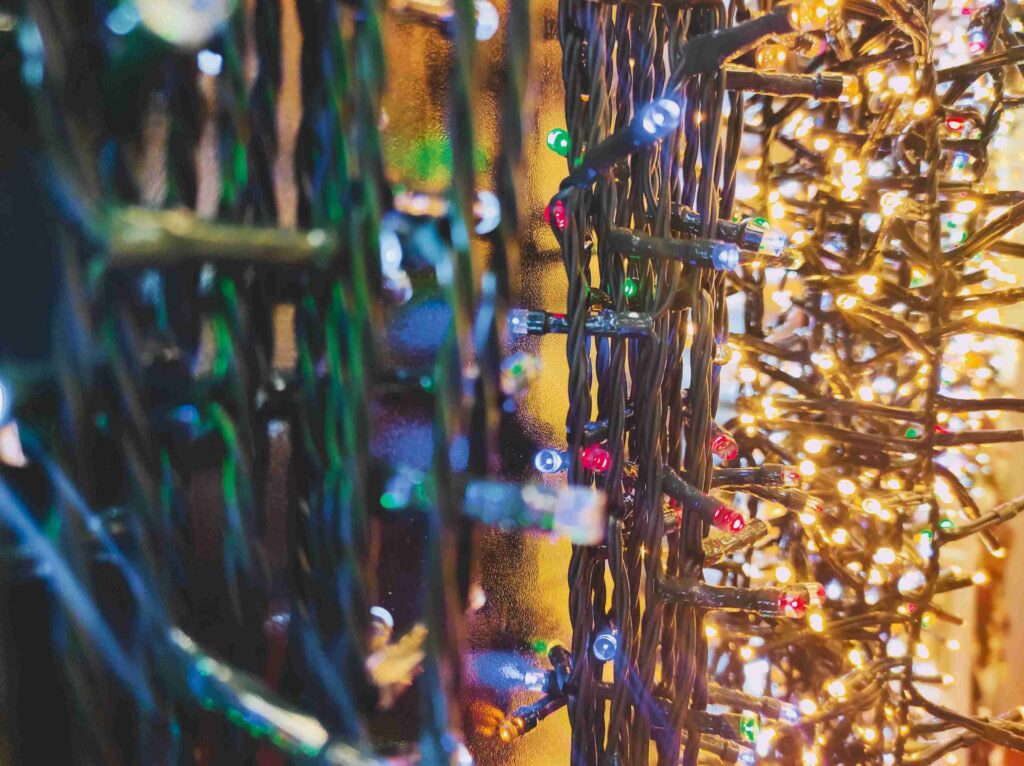
#2 LEDs Vs Incandescent Lights

The type of lights you pick matters too. 

LED lights are brighter, cooler, and use less energy, so you can use fewer of them and still get strong shine. They’re also safer since they don’t heat up.

Incandescent lights, on the other hand, give off that classic warm glow many people love. But they use more electricity, can get warm to the touch, and don’t last as long. You’ll probably need more of them to get the same brightness level you’d get with LEDs.

So if you’re using LEDs, 600 might be plenty. With incandescent, you might want to bump it closer to 900 for the same look.
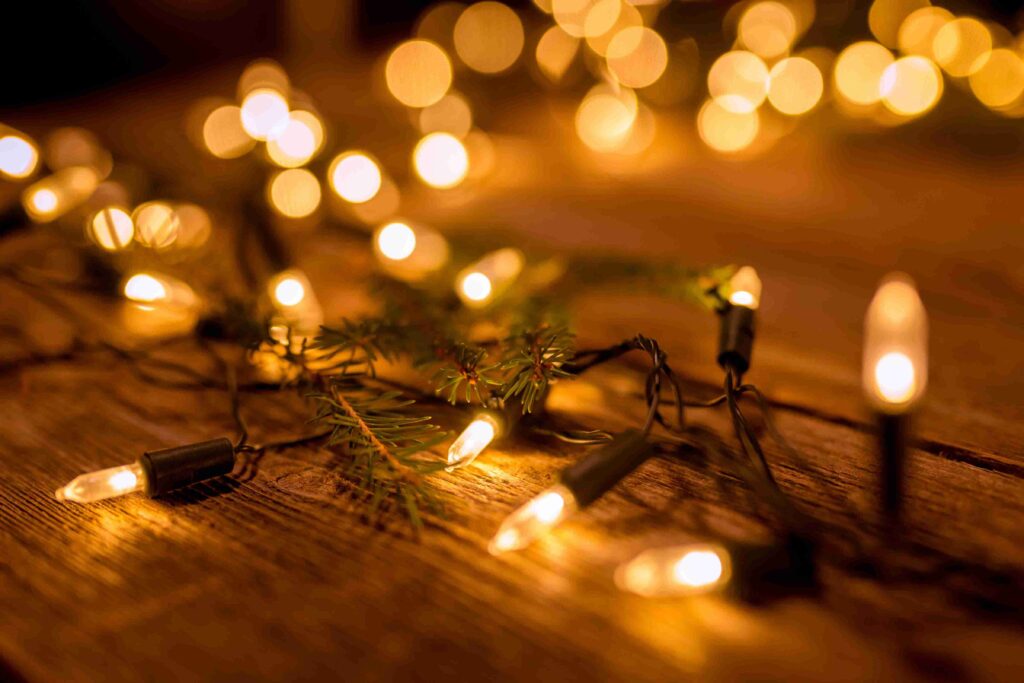
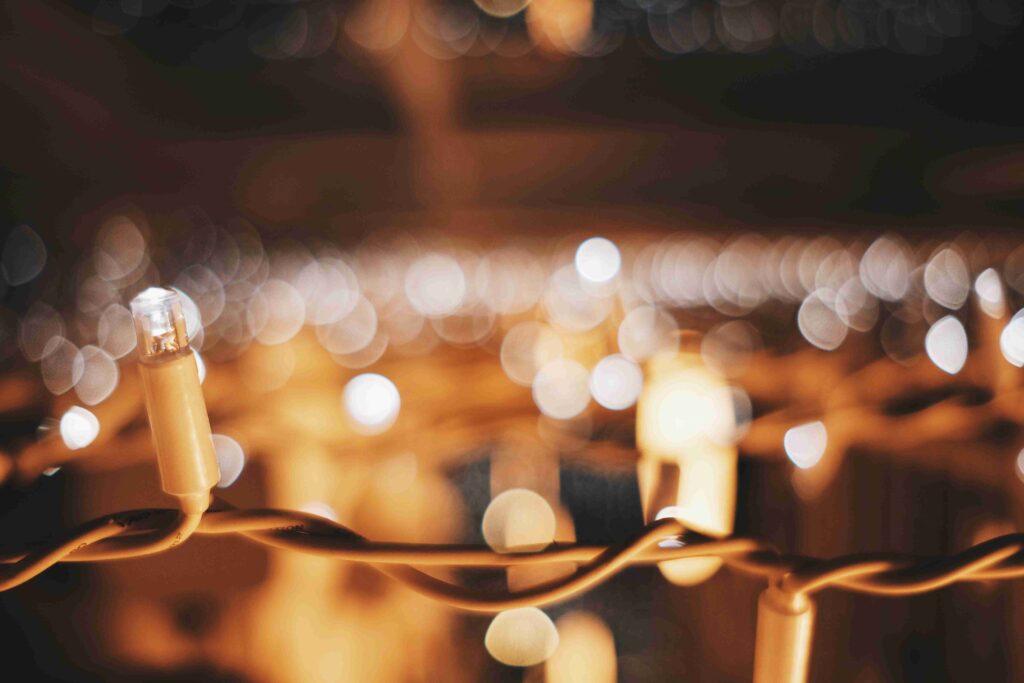
#3 Bulb Size

Bulb size can totally change the vibe of your tree. Mini bulbs give that twinkly, delicate look. Bigger bulbs like C6 or C9 are bold and make a statement.

Here’s a quick way to think about it:

  • Mini bulbs are perfect for a traditional or cozy look. Use more of them for fuller coverage.
  • C6 or C7 bulbs are medium size. It’s a good mix of bright and balanced.
  • C9 bulbs are large and bright. They’re great for outdoor trees or that “retro” Christmas style.

Bigger bulbs fill more space, so you won’t need as many. Smaller bulbs are subtler, but you’ll need more strands to fill out the tree.

Also Read: C7 Vs C9 Christmas Lights

#4 Decoration Style

Lights don’t exist alone – your ornaments, ribbon, and garland all play a part. 

Factors That Affect How Many Lights You’ll Need

If your tree has a ton of decorations, you might not need as many lights since the ornaments reflect and spread the glow. But if you like a minimal look with mostly lights and a few ornaments, you’ll want extra strands to make it shine.

Think about what kind of look you want before you start wrapping the tree. 

If your tree is packed with ornaments, around 600 lights can look great. If lights are the main focus, push it closer to 900 or even 1,000.

#5 Color Scheme

Color makes a difference too. Warm white lights create a soft, inviting glow, but they can blend into darker branches. Multicolor lights pop more but can look busier.

Cool white lights shine brighter and give that icy, wintery look. 

They tend to reflect more, so you might not need as many.

It’s all about what kind of atmosphere you want – warm and cozy, or crisp and bright.

How Many Strands You’ll Actually Need For A 6ft Tree

Now that you’ve got the big picture, let’s talk about strands. Most light strands come with 50, 100, or 150 bulbs each. So how many do you need? 

Here’s a quick guide:

  • 600 lights: about 6 strands of 100 lights each
  • 900 lights: about 9 strands of 100 lights each
  • 1,200 lights: about 12 strands of 100 lights each

You can always mix and match shorter strands too. 

Using smaller strands makes it easier to replace one if it burns out, and you won’t have to unwrap the whole tree just to fix a section.

Also Read: Are Christmas Lights Waterproof? 

Also, think about outlet placement and extension cords. Try not to overload a single outlet since most strands have a safe limit listed on the box for how many can be connected end-to-end.

If you’re using LEDs, you can usually link more strands together safely than you can with incandescent ones.

Bottom Line

You need 600 – 900 lights for a 6ft Christmas tree.

If you’re going for a warm, simple vibe, 600 lights is usually enough. For something more showy and bright, 900 lights will make your tree stand out. And if you love a dramatic, glittery glow, push it to 1,200 or more.

Once you find your favorite balance, it gets easier each year. You’ll know how many strands you like, what kind of bulbs work best, and how to wrap them just right.

At the end of the day, the perfect number of lights is the one that makes your tree feel magical when you flip that switch. 

So grab your favorite strands, turn on the Christmas tunes, and start lighting up the season.

Christmas Lights Stopped Working? (Here’s What To Do)

Nothing kills the holiday vibe faster than plugging in your Christmas lights and… nothing happens. No twinkle, no glow, just dead silence and disappointment. 

But hey, don’t toss them in the trash just yet!

There’s a good chance you can bring them back to life with a little troubleshooting. Most of the time, it’s something simple.

In this post, we’ll show you how to fix Christmas lights that stopped working.

#1. Check The Power Source

This might sound too simple, but it’s where most people go wrong first. 

Start by making sure the outlet actually works. Plug in a lamp, phone charger, or anything else you know works fine. If that doesn’t turn on either, you’ve found the issue.

Sometimes the problem is as small as a tripped circuit breaker or a GFCI outlet that popped. 

You know those outlets with “test” and “reset” buttons? Press “reset” and see if the Christmas lights start working again.

If you’re using an extension cord, test that too since cords go bad more often than you’d think, especially if they’ve been out in the cold for a few seasons.

If everything checks out but the lights are still dead, move on to the next step.

Christmas Lights Not Working

Also Read: Can Christmas Lights Catch On Fire?

#2. Inspect The Plug And Cord

Next stop: the cord and plug.

Give the whole setup a quick visual inspection. 

Unplug the lights first, then look closely at the plug, the wire, and the bulbs. You’re looking for anything that seems off like frayed wires, bent or broken prongs, or dark scorch marks.

Cords can take a beating when they’re wrapped up year after year. Sometimes they get pinched under boxes or bent at sharp angles, which can break the internal wiring. 

If you spot damage, don’t try to tape it up or “make it work.” It’s not worth the risk. 

Damaged cords can overheat or short out. Replacing the string is safer and honestly, probably easier than playing detective with burnt wires.

#3. Replace The Fuse

Most Christmas light strings have tiny fuses built right into the plug. You might not even know they’re there unless you’ve looked closely. 

Slide open the little door on the plug (it usually takes a small screwdriver or even a fingernail). 

Inside, you’ll see two tiny glass fuses.

If one looks blackened or cloudy, that’s why your Christmas lights stopped working. Pop it out and replace it with one of the spare fuses that came in the light box. They’re usually taped inside the bag of extra bulbs. 

Make sure the new fuse sits snugly in place before closing the cover and plugging the lights back in.

It’s amazing how often this simple fix brings the whole string back to life. Fuses blow for all kinds of reasons including a power surge, moisture, or too many lights connected in a row.

#4. Check For A Bad Bulb

Bad bulbs can also make your Christmas lights stop working.

If you have older incandescent strings, one bad bulb can take down an entire section. 

The tricky part is finding which one.

If you have a light tester, this part is easy. If not, you can still do it manually. Start with the first dark bulb in the line and replace it with one of your spares. Sometimes it’s obvious which bulb is burned out – you’ll see a dark or broken filament inside. Other times, it’s a guessing game. 

It can be a little tedious, but when the section suddenly lights up, it’s worth the effort.

LED lights are usually wired differently, so one bad bulb won’t take out the whole strand. 

Still, it’s good to check for any visibly damaged bulbs or loose bases. A bent pin or cracked cover can stop the current from flowing properly.

#5. Look For Loose Or Corroded Connections.

Even if all your bulbs are intact, the issue might be in the connections. 

Over time, moisture or dust can sneak into the sockets, causing corrosion. Or maybe a bulb just isn’t seated quite right.

How To Fix Christmas Lights

Also Read: How To Stop Squirrels From Chewing Christmas Lights

Unplug the lights again and gently wiggle each bulb. If one feels loose, press it back in firmly. You can also pull a few out and look inside the socket. 

If you see any greenish or white buildup, that’s corrosion, and it can block the flow of electricity.

If there’s light corrosion, you can try cleaning it carefully with a small brush or a bit of rubbing alcohol on a cotton swab. But if it looks severe or the metal parts are rusted, it’s probably time to replace that section.

Here’s a quick list of signs your connection might be the problem:

  • Bulbs flicker or work intermittently
  • One section lights up, then suddenly goes out
  • The plug or socket feels warm to the touch

Fixing the connection often brings the whole strand back instantly.

#6. Check The Controller (If It’s LEDs).

If your lights are LED and have a little control box (the thing that changes light modes or patterns), that could be the issue. 

These controllers sometimes go bad or freeze up after being in storage.

Try unplugging everything for a minute, then plug it back in and press the buttons on the controller a few times. If there’s a reset or mode button, cycle through all the options. Sometimes they just need a little wake-up.

If you have multiple LED sets linked together, disconnect them and test each one on its own. 

This helps pinpoint if one set or controller is messing up the chain.

If the controller light doesn’t turn on at all or feels warm to the touch, it might be dead. Replacement boxes can be found online or at hardware stores, but depending on the price, buying a new set might be the easier move.

Also Read: Are Christmas Lights Waterproof?

If All That Fails

Ok so you’ve checked the outlet, cord, fuses, bulbs, and even the controller. If your lights still won’t cooperate, it’s probably time to say goodbye.

Christmas lights aren’t made to last forever, especially the cheaper ones. The wiring and solder points degrade over time. After years of use, it’s not uncommon for a section or two to give out completely. When that happens, replacing the strand is usually the only realistic option.

The good news is that newer LED strings last much longer, use less power, and are safer overall. You can even find ones with built-in timers and waterproof connections now. 

If you’re replacing old incandescent lights, it’s a great time to upgrade.

When you buy new ones, store them carefully after the holidays. Wrap them around a reel or piece of cardboard instead of wadding them up in a ball. 

That small step can make them last for years without tangles or broken wires.

Bottom Line

Christmas lights are great… until they’re not. 

But most of the time, you can get them working again with just a little effort. 

Start simple: check the power, inspect the cord, and replace any bad fuses or bulbs. Take your time, don’t overthink it, and maybe keep a hot chocolate nearby to stay in the holiday mood.

And hey, if they’re really toast, maybe it’s the perfect excuse to upgrade to a snazzy new set this year. 

More colors, more sparkle, less stress. Sounds like a win, right?

C7 Vs C9 Christmas Lights (A No Nonsense Comparison)

Christmas lights can totally set the mood for the holidays. 

But walk into any store and you’ll see two popular choices: C7 and C9 lights, and suddenly it feels like you’re picking teams. 

They look alike at first, but they’re not the same. Size, brightness, cost, power draw, safety… all of it changes depending on which one you buy. 

If you’ve been stuck trying to decide which set belongs on your roofline or tree, this post is for you. We’ll compare C7 vs C9 Christmas lights against a number of different factors.

#1 Size

C7 Christmas lights are smaller than C9 bulbs. 

They’re about 1.5 inches tall and have a shape that’s sort of like a teardrop or a small cone. 

These lights are typically used for things like small trees, wreaths, or wrapping around bushes and smaller objects. They’re not super in-your-face but still provide a nice, subtle glow.

On the other hand, C9 lights are bigger. They’re about 2.25 inches tall, so they definitely stand out more. You’ll see them on larger trees or hanging along rooftops. 

If you’re looking for something that draws attention or adds a touch of drama to your display, C9 is the way to go.

Also Read: Are Christmas Lights Waterproof?

#2 Brightness

C9 lights generally give off more light simply because of their larger size.

They’re bigger, brighter, and meant to grab attention. When you drive down the street and see a house lit up from two blocks away, odds are good those are C9s.

But, here’s the thing: brightness can also depend on the type of bulb used in both C7 and C9 lights. Some C7 lights come with LEDs, which can be surprisingly bright, while C9s can be a little more traditional with incandescent bulbs, which often have a warmer glow. 

C9 Vs C7 Christmas Lights

So, if you’re all about that extra sparkle and you want something that’ll really pop, go for C9s. 

But if you’re into a gentler shine that’s not as intense, C7s are probably better.

#3 Power Usage

C9 Christmas lights use more power than C7s.

C7s usually run around 5 – 7 watts each. C9s can pull 7 -10 watts per bulb. 

Multiply that by a couple hundred bulbs, and suddenly you’re putting some serious load on your circuits!

But that’s only with incandescent. If you go LED, the story changes. 

LED C7s and C9s sip electricity, often less than a single watt per bulb. You can run long strings of LEDs without worrying about tripping breakers or running up the power bill. 

For most people, LEDs are the smarter move just because of efficiency.

Also Read: Can Christmas Lights Catch On Fire?

#4 Aesthetic Look

When it comes to appearance, you can’t really go wrong with either option.

C7 lights have a more delicate, vintage vibe. 

Their smaller size makes them great for smaller spaces and gives off a softer, cozier feeling. You’ll often see them on tabletop trees, mantels, or around windows. 

They don’t overpower the surroundings, which is perfect if you like a more understated holiday vibe.

C9 lights, though, are bolder and more dramatic. 

They’re perfect for larger spaces like outdoor decorations, bigger trees, or outlining rooftops. They create a more festive, eye-catching atmosphere. 

If you want your lights to be noticed, C9s are the way to go.

#5 Best Applications

Now that we know the basics about size, brightness, and energy, let’s talk about where these lights are best used.

C7 lights are fantastic for indoor decorations. Think about hanging them in your windows or around a fireplace. They’re ideal for smaller trees, wreaths, and those charming holiday touches that don’t need to be super flashy. 

You’ll often see them in those cozy, traditional holiday setups.

C9 lights are better suited for larger outdoor displays. 

If you’re looking to light up your entire roofline, outline a big tree in the yard, or create a massive light-up scene, these larger lights are made for that. 

Their size and brightness make them perfect for going big and bold with your decorations.

Should I Get C9 Or C7 Christmas Lights

#6 Cost

Price depends on the style, the brand, and if you go incandescent or LED.

In general, C7 lights are usually a little more affordable. 

The smaller size means less material used, and they typically come in sets with fewer bulbs, which can make them cheaper overall.

C9 lights cost more, especially if you’re going for the incandescent versions. You’ll be paying for the bigger bulbs and the brighter shine, plus you might end up needing a few more strands if you’re covering a large area. 

So, if you’re on a budget, C7 might be a better fit.

Also Read: Can You Paint Christmas Lights?

#7 Durability

Durability comes down to 2 things: the bulb itself and how much stress it puts on the wiring. 

Both C7 and C9 bulbs can last a long time if you store them properly and don’t bang them around. 

The bigger surface area of C9s means they’re slightly more vulnerable to breaking if dropped, but in practice, most of the durability issues come down to the quality of the bulbs you buy.

LEDs again win the category. They don’t burn out nearly as fast as incandescents, and they don’t get as hot, which puts less wear on the sockets and wires. 

That’s why more people are making the switch.

#8 Circuit Capacity

C7 Christmas lights have more circuit capacity than C9 bulbs.

C9 lights typically draw more power because of their larger size and brighter bulbs. This means you can’t hook up as many strings of C9 lights to a single circuit without risking overloading it. 

If you’re planning on using a lot of lights, don’t push your circuit capacity too much.

C7 lights, being smaller and more energy-efficient, can be strung together more easily. 

You can usually connect more strings of C7 lights on a single circuit, which is handy if you want to cover a larger area without worrying about overloading.

#9 Heat And Safety

One big consideration is heat. 

Incandescent bulbs, which are often used in C9 lights, can get pretty hot. 

This can be a concern, especially if you’re using them outdoors and there’s a chance they might get knocked over or come into contact with something flammable.

C7 lights, again, especially in LED form, run much cooler. 

If safety is a priority, these are definitely the way to go. LEDs don’t generate nearly as much heat, making them safer to use in close quarters or on decorations that could catch fire.

Should I Get C9 Or C7 Christmas Lights?

By now, you probably have a better sense of what each type of light brings to the table. But the big question remains: Which one should you choose?

Well, it depends. If you’re decking out a large outdoor space or want something that’ll really grab attention, C9 lights are your best bet. They’re bold, bright, and perfect for big, eye-catching displays.

However, if you’re on a budget, looking for a more subtle glow, or just want something energy-efficient, C7 lights are a great choice.

If you’re still torn, here’s a quick way to think about it: C7s are for detail, C9s are for impact.

Bottom Line

The main difference between C7 and C9 Christmas lights is that C7 bulbs are smaller, softer in brightness, cheaper to run, and are safe for indoors since they give off less heat and let you run more bulbs per circuit. 

C9 bulbs, on the other hand, are larger, brighter and bolder. They cost a bit more, draw more power, and can run hotter in incandescent form.

Can Christmas Lights Catch On Fire? (Solved)

The holiday season just wouldn’t feel the same without twinkling Christmas lights. They make everything feel cozy, magical, and picture-perfect. 

But along with all that sparkle, there’s usually a tiny voice in the back of your head wondering if these lights actually catch on fire.

It’s a fair question, and the short answer is yes, they can.

But the good news is, it’s not super common if you use them safely and take basic precautions.

In this post, we’ll explain how Christmas lights can catch on fire, signs it might be unsafe and how to avoid all that.

Do Christmas Lights Catch On Fire?

Christmas lights can catch on fire, but the risk is usually tied to misuse, poor quality, or age. 

Christmas lights are electrical devices, and just like phone chargers or extension cords, they can overheat if pushed too hard.

The wires carry current, and if those wires are damaged, cheap, or overloaded, things can heat up. Add in a dry Christmas tree or a stack of wrapping paper, and you’ve got a recipe for trouble.

But don’t panic. Millions of households light up every December without incidents! 

Fires caused by Christmas lights are not an everyday occurrence, but they do happen. According to fire safety reports, holiday decorations spark thousands of house fires each year, and lights are a part of that mix.

Do Christmas Lights Catch On Fire

Common Fire Hazards To Watch For

Now, let’s talk about how Christmas lights can catch on fire.

There are a few specific troublemakers that keep showing up in fire incident reports. And honestly, most of them are easy to avoid once you know what to look out for:

#1 Old Lights With Frayed Wires

You know that tangled ball of lights you’ve been reusing since the early 2000s? 

Yeah, those can be sketchy. Over time, wires get brittle, sockets crack, and insulation wears down. Once that protective coating starts breaking, the electrical current inside can arc, spark, or just get way too hot.

Also Read: Christmas Lights Keep Blowing Fuse

Even tiny nicks in the wire can be risky because they expose the copper underneath.

The fix is simple: inspect your lights before using them each year.

If you see cracked wires, broken bulbs, or anything that looks suspicious, toss them. It’s not worth saving a couple of bucks if it means putting your home at risk.

#2 Too Many Strands Plugged Together

We’ve all been tempted to go full Clark Griswold and string enough lights to be seen from space. 

But plugging too many strands into one outlet or extension cord is asking for trouble. 

Electrical circuits are designed to handle only so much current. Overloading them can make wires heat up, trip breakers, or in the worst case, start a fire.

A lot of modern LED sets let you connect more strands safely than older incandescent ones, but there’s still a limit. 

So always check the packaging or instructions. If you can’t find them, play it safe and use a power strip with built-in surge protection and don’t go overboard.

Signs Your Christmas Lights Might Be Unsafe

#3 Using Indoor Lights Outside

Not all Christmas lights are the same. Some are designed to handle rain, snow, and cold weather, while others are strictly for cozy indoor use. 

Using indoor Christmas lights outside can make them catch on fire. 

How? Moisture can seep into the sockets and wiring which can cause shorts or sparks.

So the next time you’re shopping for lights, always look for the label. It will say “indoor” or “indoor/outdoor.” If you’re not sure, assume they’re indoor-only. 

Outdoor-rated lights have extra protective coatings to handle the elements.

Also Read: Are Christmas Lights Waterproof?

#4 Dry Christmas Trees That Can Ignite Easily

A fresh Christmas tree looks gorgeous, but once it dries out, it basically turns into a giant piece of kindling. Combine that with hot lights, and you’ve got a dangerous combo. 

A dry tree can go up in flames shockingly fast – it’s the stuff of fire safety demonstration videos.

If you love a real tree, keep it watered. 

Also check the water level daily, and make sure it never dries out. 

As soon as the tree starts dropping needles like crazy, it’s time to take it down. If that feels like too much hassle, artificial trees are a solid option.

Signs Your Christmas Lights Might Be Unsafe

Okay, so how do you know if your Christmas lights are heading into danger zone territory? There are a few warning signs you should pay attention to:

  • Wires that feel hot to the touch.
  • Flickering bulbs or strands that randomly go dim.
  • Exposed copper or cracked plastic around the sockets.
  • A faint burning smell or tiny sparks when plugging them in.

If you notice any of these, don’t mess around. Unplug the lights immediately and replace them. 

Christmas lights are cheap compared to dealing with smoke damage or worse.

Also Read: What Gauge Wire For Landscape Lighting?

Are LED Or Incandescent Christmas Lights Safer?

If you’re still rocking those old-school incandescent Christmas lights, it might be time to upgrade. 

Incandescent bulbs work by heating up a filament until it glows, which means they generate quite a bit of heat. That heat can dry out a Christmas tree faster and raise the risk of fire if the bulbs are pressed against something flammable.

LED lights, on the other hand, stay cool to the touch. 

They use way less electricity, last longer, and don’t strain your circuits nearly as much. They also let you safely connect more strands together. 

On top of that, LEDs come in every style imaginable, so you’re not sacrificing looks for safety.

So, if you’re wondering which is safer, LEDs win hands down. They’re basically the modern upgrade we should all be using.

Bottom Line

Christmas lights are safe when you treat them with a little respect. 

Fires linked to holiday decorations do happen, but the causes are usually preventable: old, frayed lights, overloaded outlets, indoor lights outside, or dry Christmas trees. 

By checking your lights, using the right type, and turning them off when you’re not around, you can reduce the chances of it catching on fire.

And if you have incandescent Christmas lights, consider changing to LEDs.

Can You Paint Christmas Lights? (Solved)

Christmas lights are fun, festive, and honestly one of the best parts of the holidays. 

But sometimes the standard red, green, or white strands just don’t cut it. Maybe you want pastel lights for a softer vibe, or maybe you’re decorating for a wedding and want them in your exact color scheme.

If you’re wondering if you can paint Christmas lights, this post is for you.

We’ll go over everything you need to know about painting Christmas lights.

Can You Paint Christmas Light Bulbs?

Yes, you can paint Christmas lights. But you have to use the right kind of paint because some paints can’t handle the heat of a bulb, and some can peel, flake, or even burn if you’re not careful.

For traditional glass Christmas light bulbs, a thin layer of transparent glass paint works best. 

These paints are designed to stick to smooth surfaces and allow light to pass through, which keeps your bulbs glowing instead of looking dull or blotchy. 

If you’re working with incandescent bulbs (the old-school kind that get hot), you’ll want to make sure the paint is also heat-resistant.

LED Christmas lights are easier to work with. 

They stay cooler, so you don’t have to worry as much about the paint baking on. Some people even use permanent markers for quick color changes on LEDs, though glass paint still gives a nicer, more polished finish.

Painting Christmas Light Bulbs And Wires

Also Read: Are Christmas Lights Waterproof?

What you don’t want to do is grab thick acrylics, chalk paint, or regular spray paint. These paints block light, create uneven surfaces, and just don’t hold up. 

The result ends up looking patchy and, honestly, a little sad. 

So stick to thin, transparent paints and you’ll be much happier with the results.

Can You Paint The Cords/Wires?

Now let’s talk about the cords. 

Maybe you’ve got green wires but you’re decorating a white tree. Or maybe you’re stringing lights along a white wall and want them to disappear a bit more. 

Good news: painting cords is much simpler than painting bulbs.

Acrylic craft paint or spray paint usually works fine here. Just make sure you apply it in thin layers so the paint doesn’t gum up around the sockets. 

You’ll also want to avoid painting plugs or the part where the bulb screws in, since that can mess with the electrical connection.

One tip: tape off the sockets and plugs before you start. 

That way you can spray or brush on paint without worrying about accidentally coating something important. 

Once the tape comes off, you’ll have a neat, clean finish that blends into your décor.

Also Read: Can’t Open Outdoor Light Fixture

Easy Alternatives To Painting Christmas Lights

Sometimes painting sounds like fun until you realize how much effort it takes. If you’d rather skip the brush and still get custom lights, there are some super easy alternatives.

Use Bulb Covers

These little snap-on caps are one of the simplest fixes. 

You just pop them over your bulbs and boom – instant color change. They come in tons of options, from soft frosted looks to bold, jewel-toned covers. 

The best part is you can take them off whenever you want your lights back to their original state.

DIY Diffusers

If you’re feeling crafty, ping-pong balls are a favorite hack. 

Cut a small hole in each ball and slip it over your bulb. It softens the light, spreads it out, and creates a dreamy, glowing effect. 

You can even paint the balls themselves if you want a splash of color without touching the bulbs. 

This trick works especially well with LED strands, since they don’t heat up much.

Buy Pre-Colored Strands

Sometimes the easiest option is the most obvious: just buy lights in the color you want. 

Alternatives To Painting Christmas Lights

Stores carry an endless variety these days, from pastels and metallics to themed strands for different holidays. The upfront cost might be a little higher, but it saves you time and guarantees a professional, even finish. 

Plus, you don’t have to worry about paint chipping off down the road.

Also Read: How To Stop Squirrels From Chewing Christmas Lights

Painting Safety Tips You Shouldn’t Skip 

If you do decide to paint, a little extra caution goes a long way. Lights are electrical, bulbs get warm, and paint isn’t always made with heat in mind.

Here’s what you should be doing:

#1 Never Paint Lights While Plugged In

This one feels obvious, but it’s worth repeating because it’s so important. 

Always unplug your lights before painting. 

Plugged-in strands are not only unsafe to handle, but they’re harder to paint neatly. 

Unplugging also gives you the freedom to spread them out on a table, floor, or even hang them up to dry without worrying about live wires.

#2 Avoid Flammable Paints

Like we said, there are tons of different paints out there. Some have solvents that make them more flammable, especially when exposed to heat. 

Always check the label for heat resistance or suitability for glass and ceramics. 

Choosing the right paint means your lights won’t just look better, they’ll also be safer to run for long hours.

#3 Do Thin, Even Coats

Thick paint looks messy and can trap heat. The safer way to go is multiple light coats. 

This gives you more control over the final color and prevents your bulbs from overheating. 

Plus, the finish will look smoother and last longer without cracking or peeling. Think of it as building up the look slowly instead of trying to nail it all in one go.

#4 Test A Small Section First

Before you commit to painting an entire strand, do a test run. 

Paint just a couple of bulbs or a small section of cord. Let it dry fully, then plug it in and see how it looks. This lets you tweak your method before you go all-in. 

Maybe you’ll find you want a second coat, or maybe you’ll decide you prefer an alternative option like covers instead. 

Either way, testing saves you time and frustration.

Bottom Line

Yes, you can paint Christmas lights. For bulbs, stick to transparent glass paint or heat-resistant options. For cords, acrylics or spray paint work well as long as you keep them off plugs and sockets.

But if painting sounds like a hassle, you’ve got plenty of easy alternatives like bulb covers or pre-colored strands. Sometimes the simplest solution is also the best.

Either way, with a little creativity, you can make your Christmas lights match any theme, mood, or event.

How To Stop Squirrels From Chewing Christmas Lights

Squirrels are cute until they chew through your Christmas lights like they’re part of their daily snack routine. 

You go to all this effort putting up your lights, making your house look like a scene from a holiday movie, and then there’s a dark patch in the middle of your tree. Thanks, squirrels.

So if you’re tired of spending money on new lights every year or constantly repairing chewed-up cords, this post is for you!

We’ll show you exactly how to stop squirrels from chewing Christmas lights.

#1. Apply A Repellent

The easiest way to stop squirrels from chewing Christmas lights is to spray the lights with something squirrels hate. 

They’re smart little guys, but also super sensitive to taste and smell. So when they bite into something gross, they usually think twice before coming back.

You can buy repellent sprays made specifically for rodents and squirrels. 

Look for ones with capsaicin (that spicy stuff in hot peppers) or bittering agents. They’re non-toxic but extremely unpleasant for animals.

Also Read: Cat Chewing On Christmas Lights

If you’re more of a DIY type, mix up a homemade spray. A combo of water, a bit of dish soap, and some cayenne pepper or hot sauce works great. Some people like adding peppermint oil too, since that strong scent tends to drive critters nuts (in a bad way).

Just spray it directly on the wires and you’re done.

Make sure to reapply every few days, especially if it rains or snows.

#2. Protect The Wires

Another reliable option is to physically block their teeth. 

Squirrels Chewing Christmas Lights

You can slip your light strands into clear vinyl tubing, split-loom tubing, or even run them through plastic conduit. These covers act like armor and make it almost impossible for squirrels to chew. 

It takes a bit more setup at first, but it’s worth it for the peace of mind if you’ve had squirrels go after your decorations year after year. 

On top of that, the tubing also helps protect your lights from rain, snow, and general wear, so they tend to last longer overall. 

Think of it as a double layer of protection: your lights look great, and the squirrels stay out of the picture.

Also Read: Are Christmas Lights Waterproof?

#3. Use Deterring Scents

Squirrels have a strong sense of smell. You can use that to your advantage.

Certain scents just drive them crazy. In a bad way. 

Peppermint oil is a big one. You can soak cotton balls in it and tuck them near your light displays. It smells like Christmas to us, but to a squirrel, it’s a “get outta here” sign.

Vinegar works too, but it’s a bit… pungent. Not everyone wants their front porch smelling like a salad. Another option is garlic. Some people swear by garlic powder sprinkled around the base of trees or bushes!

You can also buy commercial deterrent granules that smell bad to critters but are safe for pets and people. 

The idea here is to create a zone they don’t want to be in. This will stop squirrels from chewing Christmas lights.

#4. Remove Attractants

If your yard is squirrel paradise, no amount of peppermint oil is gonna stop them. So it helps to remove the stuff that makes them want to hang around in the first place.

First up: bird feeders. Squirrels love them. 

If you’ve got one nearby, it’s basically an open buffet for them. Either take it down while your lights are up, or switch to a squirrel-proof version.

Also, keep the yard tidy. Fallen acorns, nuts, fruits – those are free snacks for squirrels. 

Rake often. And if you’ve got trees near your house, trim back the branches. Squirrels use them like highways. Cut their path and they’ll be less likely to drop in for a bite of your string lights.

Basically, make your yard less of a hangout spot. If there’s nothing good to eat or climb, they won’t stick around.

Also Read: Where To Place Landscape Lighting?

#5. Switch To Squirrel-Resistant Lights

Yeah, this is a thing. 

Some Christmas lights are built to be tougher and less chewable. They use thicker cords or rubber coatings that squirrels find less appealing.

Squirrels Ate Christmas Lights

Look for LED lights with heavy-duty wiring. Bonus: they’re also energy-efficient and last longer. 

Some brands even advertise their lights as “critter-resistant,” which is exactly what you want.

It might cost a little more upfront, but it can save you a lot of frustration and cash down the line. If you’ve been dealing with this problem year after year, it’s probably worth the upgrade.

#6. Motion Detectors / Ultrasonic Repellers

Want to freak out a squirrel without lifting a finger? Technology’s got your back.

Motion-activated devices can work wonders. Things like sprinklers that spray when something moves nearby, or lights that suddenly flash, or even little speakers that emit high-frequency sounds only animals can hear.

These tools are super useful if you’ve got lights in trees, bushes, or anywhere squirrels like to explore. A quick zap of water or a loud noise usually sends them running. 

Plus, they’ll remember and avoid that area after a few surprises.

Just make sure whatever you use is outdoor-safe and weatherproof. There’s a lot of gear out there now specifically for this kind of pest control.

What NOT To Do

Now let’s talk about what not to try. 

First off, skip the poison. It’s dangerous, often illegal, and totally inhumane and unnecessary. It can hurt pets, other animals, and even people.

The same goes for traps. You don’t want to get into the whole mess of capturing squirrels or accidentally hurting one. Plus, it doesn’t solve the problem – more squirrels will just show up.

And don’t count on fake owls or plastic snakes. Unless you’re constantly moving them around, squirrels will figure out they’re fake. They’re not easily fooled for long.

Please stick to the safe, kind, and effective methods.

Bottom Line

Squirrels chewing on Christmas lights is one of those weirdly common holiday headaches. But it doesn’t have to ruin your vibe. 

Start with some repellent spray. Add a little wire protection. Keep the area clean and throw in a few peppermint cotton balls. If they’re still not getting the hint, tech options like motion sensors and stronger lights can be the final push.

The key is to make your lights annoying and unappetizing.

Once they realize it’s not worth the trouble, they’ll move on to less defended yards.

Are Christmas Lights Waterproof? (Explained)

There’s nothing like stringing up Christmas lights to flip the switch on holiday spirit. 

But before you climb the ladder and start clipping them to your gutters, there’s one thing you need to figure out – can they actually handle being outside in the rain, snow, and cold?

Spoiler: not all lights are built for the same job. Some are made for outdoor life, some aren’t, and using the wrong kind in the wrong place can lead to big problems.

In this post, we’ll explain if Christmas lights are waterproof and how to make sure you’re using the right lights.

Are Christmas Lights Waterproof?

Christmas lights are not fully waterproof, but many are water-resistant and safe for outdoor use. 

Indoor-only lights cannot handle rain, snow, or moisture and should never be used outside. They’re made for cozy living rooms, not front yards in December storms. 

The wires, plugs, and sockets on indoor sets just aren’t built to deal with rain, sleet, or snow. Take them outside, and you’re basically asking for trouble.

Outdoor-rated lights, on the other hand, have extra layers of protection. 

The wiring is sealed better, the bulbs and sockets are made to keep moisture out, and the plugs are designed to work with weatherproof covers. 

But even then, they’re not indestructible.

Are Christmas Lights Water Resistant

Also Read: Can You Cut Christmas Lights?

What “Waterproof” Really Means For Christmas Lights?

So, when you hear “waterproof,” what exactly does that mean?

In everyday language, “waterproof” sounds like something that can survive a flood. But in the world of electrical products, it’s more like “water-resistant to a point.” 

There’s a big difference between being able to sit out in the rain and being able to run underwater.

When you see “waterproof” on Christmas lights packaging, it generally means they’re safe to use outdoors in wet conditions. That includes rain, snow, and humidity. 

But if you were to submerge them, even the outdoor-rated sets would fail.

IP Ratings

If you want to know exactly how water-friendly your lights are, check their IP rating.

IP stands for “Ingress Protection,” and it’s the official way to measure how resistant a product is to water and dust. 

Here’s how it works: the IP rating is made up of two numbers. The first one tells you how well the lights can handle dust or dirt. The second one shows you how well they resist water.

For example:

  • IP44 means your lights are protected against solid objects over 1mm and splashing water from any direction. It’s safe for most outdoor use.
  • IP65 means your lights are dust tight and protected against water jets. More protection for harsher weather.
  • IP67 means your lights are dust tight and protected against immersion in water up to 1 meter for a short time.

Most outdoor Christmas lights are IP44 or higher. If you can’t find the rating on the packaging, look it up on the manufacturer’s site.

Dangers Of Using The Wrong Lights Outside

What happens if you use the wrong lights outside? Unfortunately, it’s not just about ruining your holiday display. There are real safety risks involved.

First, when non-outdoor lights get wet, they can short out. 

This could lead to lights not working, but it can also cause dangerous issues, like sparks or even fires. Wet lights, exposed wiring, and faulty connections are the perfect recipe for a disaster. 

Plus, if the lights aren’t properly protected, water could get into the wiring and cause an electrical shock if you or anyone else touches them.

Then, there’s the risk of your lights just not lasting as long. 

Also Read: How Much Does Christmas Light Installation Cost?

If your lights are meant for indoor use and you put them outside in the rain or snow, they could burn out quicker, leaving you with dark spots on your house when you least expect it. 

How To Check If Your Christmas Lights Are Safe For Outdoors

Not sure if your Christmas lights are safe for outdoor use? No problem! You don’t have to guess. Manufacturers make it pretty easy to figure out what’s safe for where.

How To Check If Your Christmas Lights Are Safe For Outdoors

Start with the label on the string of lights (yep, the one you usually ignore). 

It’ll clearly say “Indoor” or “Indoor/Outdoor.” 

If you spot an IP rating like IP44 or IP65, you’re in business. Those ratings tell you how much dust and water the lights can handle like we said, and anything IP44 or higher is generally fine. 

If the box or tag is long gone, you can usually find the info on the manufacturer’s website.

If you’re still not sure, play it safe and use them indoors. It’s better to buy a separate set of outdoor lights than to risk an electrical hazard.

Tips For Keeping Outdoor Lights Safe In Wet Weather

Even outdoor lights can use a little help staying safe and functional through the season. Here are some of our best tips for you:

Also Read: Cat Chewing On Christmas Lights

  • Use weatherproof extension cords and covers to keep connections dry.
  • Keep plugs and connectors off the ground since moisture pools at the lowest point.
  • Secure your lights tightly so wind doesn’t loosen them and expose wiring.

These small habits can mean the difference between your lights lasting years or fizzling out before New Year’s.

Bottom Line

Christmas lights aren’t completely waterproof, but the right outdoor-rated ones can handle rain, snow, and damp winter nights without a problem. 

Indoor sets should never leave the house, and even outdoor sets appreciate a little extra care in bad weather.

Always check the rating, read the label, and give them some extra protection in bad weather. That way, you can enjoy your holiday glow without worrying about sparks flying.

How To Store Net Lights Like A Pro

The holiday season is over, and it’s time to take down those beautiful Christmas net lights you worked so hard to hang.

But before you throw them into a bag and forget about them for the year, it’s worth taking a few extra minutes to store them properly. 

Doing so ensures they stay in good shape and makes decorating next year a whole lot easier. 

In this post, I’ll show you how to store net lights like a pro — because nobody wants to deal with a tangled mess when the holidays come back around!

#1 Untangle The Lights Before Storing

Couple Laughing While Storing Net Lights Getting Tangled Resized

You’ve probably been there. The holidays end, and you think, “I’ll deal with this mess of tangled lights next year.” But trust me, it’s a lot worse when you’re in a rush to decorate in December. 

Before packing away your net lights, take the time to untangle them. 

Yes, it might take a few minutes, but it will save you time when you pull them out next year.

Spread your nets out on the ground or find a big table, then start working through any tangles you spot. Pay extra attention to the spots where sections connect – they tend to get pretty knotted up. 

You could even hang them up on a hook or a rod as you go, making sure everything stays nice and straight.

Also Read: Can You Cut Christmas Lights?

#2 Roll Up The Lights

Once you’ve got your lights all untangled, the next step is to roll them up. 

Don’t just throw them in a pile! Wrapping them neatly into coils prevents future tangling and keeps everything organized. If you want to go the extra mile, you can use a spool or a piece of cardboard to keep them secure as you roll. 

Just be sure not to wrap them too tightly — you don’t want to damage the wires. 

Once rolled up, you can use twist ties or zip ties to secure the coil and keep it from unwinding. 

This makes it so much easier to pull the lights out next year without dealing with a big mess.

#3 Use Storage Bags Or Bins

Net Lights Storage Guide With Coffee Bean Boxes Resized

Now that your net lights are neatly rolled up, it’s time to think about storage. 

You want something that will protect the lights from dust, moisture, and any potential damage. Don’t just toss them in a random bag or box! 

Plastic bins with secure lids work great because they keep the lights safe from the elements and can be stacked for easy storage. 

Or, you can buy storage bags designed for holiday lights. These are often a little more flexible and portable, plus they usually have compartments to keep everything organized. 

Whatever you choose, just make sure your lights are in a container that will protect them.

Pro tip: throw in some silica gel packets to handle any moisture that might sneak in there.

Also Read: Cat Chewing On Christmas Lights

#4 Avoid Extreme Temperatures

 Where you store your net lights really matters. 

Find a cool, dry spot away from sunlight and temperature swings. 

Skip the attic or garage – they get too hot and too cold. Heat can mess up the plastic parts and wiring, and cold can make the wires break easily. 

A closet or basement works much better. 

Try to keep the temperature between 50-80°F (10-27°C).

Oh and always keep an eye on your storage spot for water problems or unwanted critters that could damage your lights.

#5 Label Or Mark The Storage

If you’re like me, you probably have more than one box of holiday decorations. 

So when it’s time to find those net lights again next year, the last thing you want to do is open every box looking for them. This is where labeling comes in handy. 

Take a few minutes to label your bins or bags. 

You can use masking tape and a marker to note exactly what’s inside. 

If you want to get fancy, a label maker works great for clear, neat labels. 

Marking your storage containers makes it so much easier to grab the right box when it’s time to decorate. You’ll save time and avoid unnecessary digging.

Also Read: Is uplighting worth it?

A quick phone photo of your labels can be super helpful too – you’ll know exactly what you have without digging through storage.

#6 Check The Lights Before Storing

Before you toss your lights into storage, give them one last check. 

This is the perfect time to check for any broken bulbs, frayed wires, or other issues. 

If something’s broken, it’s way easier to fix it now than it will be when you’re trying to hang them up next year. Replace any broken bulbs and make sure the wires are in good condition. 

This will save you from the frustration of discovering a problem when you’re ready to decorate. 

#7 Avoid Overpacking

Don’t try to squeeze too many sets into one container – it’s tempting, but it’s not worth it.

When you pack too tightly, the lights can get damaged, bent, or crushed. 

Instead, use multiple bins if necessary. It’s better to have a couple of smaller containers than to risk cramming everything into one too-big box. 

Plus, having separate bins for different types of lights (like string lights or icicle lights) will help keep everything organized.

You also want to make sure the lights have enough room to stay in good condition.

Try using cardboard dividers or bubble wrap between layers for extra protection. A good trick is to leave about 20% of the container empty – this prevents the lights from getting squished.

Bottom Line

Yes, storing your net lights properly takes some time, but it’s definitely worth the effort.

Storing them in a cool, dry place and labeling everything makes finding them a breeze, while checking for any damage before packing them away ensures your lights are ready to shine. 

Avoid overpacking to prevent damage, and your lights will be good as new next Christmas. 

A little extra care now means less trouble when the holidays roll back around, and who doesn’t want that? Happy decorating (next year)!

How Much Does Christmas Light Installation Cost In Virginia? 

Getting your home ready for the holiday season in Virginia?

Professional Christmas light installation can turn your property into a festive wonderland, but it’s important to understand what you’re getting into cost-wise.

In this guide, we’ll break down how much does Christmas light installation cost in Virginia, and the factors that affect your final bill.

We’ll also go over our Christmas light installation prices and the discounts we offer.

Average Christmas Light Installation Costs In Virginia

The average cost for Christmas light installation in Virginia is about $2.50 to $7 per linear foot. You’re generally looking at spending between $100 and $1,200 for an average home.

Here’s a rough breakdown of what to expect:

  • Basic Installations (Small to Medium Homes): $250 – $600
  • Larger Installations (Medium to Large Homes): $400 – $1,200
  • Elaborate Displays (Large Homes with Custom Features): $700 – $1,800+

Remember, these are just ballpark figures – your actual cost could be different based on what you want.

Most people end up paying around $400 for their light installation, which gets you good quality LED lights and a nice, basic design.

Also Check Out Our: Richmond Christmas Light Installation service 

Our Christmas Light Installation Prices

Dominion Lightworks

Here’s a breakdown of our Christmas Light Installation prices to help you get started:

These prices are for the basic installation, but if you have any special requests or want something customized, just let us know, and we’ll work out a quote for you.

Front Fascia Lighting

This is the classic look—lights along the front edge of your roof. 

We charge $5.70 per foot of lighting, and the total cost usually ranges from $400 to $900, depending on the size of your home.

If your roof is slate or another material we can’t walk on safely, we charge a bit more for installation at a rate of $7.80 per foot.

Ridgeline Lighting (3D Effect)

For that extra festive touch, we can add lights along the ridgeline of your roof to give it a 3D effect. We charge $7.80 per foot for this service, whether your roof is shingled or another type.

What Affects The Cost Of Christmas Light Installation?

Here are some of the main factors that affects how much christmas lights cost in Virginia:

#1 Size Of The Property

Bigger houses need more lights and take longer to decorate, so they cost more. 

For example, if your house is around 2,000 square feet, you’re probably looking at about $250 – $600 for basic installation. Double that size to 4,000 square feet, and you’re looking at $500 – $1,600 or more. 

Don’t forget about other structures too – detached garages, sheds, or long driveways can all add to the total square footage we need to cover. 

Also Read: Can You Cut Christmas Lights?

Even features like wrap-around porches or multiple roof levels can increase the overall size we need to work with.

#2 Type Of Lights

The type of lights you use will also affect the cost. Professional LED strands usually cost between $15-25 each, while regular incandescent ones go for $5-10.

LED lights cost more to buy at first, but they’ll save you money over time because they use less electricity and last longer.

Regular incandescent lights are cheaper to buy but use more power and need to be replaced more often.

#3 Design Complexity

The more intricate your design, the more it’s going to cost. 

A simple setup along your roofline might run $400-600, but if you want things like animated displays or lights that sync to music, you’re looking at $2,000 or more.

Things like roof peaks, window outlines, and wrapped trees all add to the complexity. 

Plus, we also need to consider whether you want different zones of lights that turn on separately or if you’re looking for special effects like twinkling or fading patterns. 

#4 Labor And Time

You’re paying for skilled professionals and their equipment.

So, the more time and labor it requires to install the lights, the more it costs.

Most installations take 4-8 hours, depending on what you want done. This includes not just hanging the lights but also testing all connections, securing everything properly, and programming any special features.

#5 Timing

When you plan to have your holiday lights installed can really impact the price. 

If you’re aiming to have everything set up right before Christmas or Thanksgiving, expect to pay more. During peak holiday season, installers are in high demand, so they often charge a premium. 

Plus, it might be harder to find available dates that fit your schedule.

On the flip side, if you’re okay with putting up your lights a little earlier (say, in early November) or taking them down after the New Year, you might get a better deal. 

Off-season installation tends to be cheaper since there’s less demand.

Also Read: How To Stop Cat Chewing On Christmas Lights

#6 Additional Services

Extra stuff like putting in new outlets, setting up timers, or programming custom light shows will add to your bill.

New electrical outlets cost $150-250 each, and smart control systems run between $200-500. 

We might also need to install special clips or brackets, add extension cords, or set up weather protection for certain components

#7 Removal Fees

Taking down the lights usually costs between $200-400, depending on how complex your setup is. Some companies include this in their initial price, but others charge extra for it.

Other Things That Could Impact The Price

Dominion Lightworks

Beyond the basic installation factors, there are other things that can affect your final cost. 

These might not be obvious at first, but they’re important to keep in mind when planning your holiday display. Some of these are:

#8 Location

Where you live in Virginia matters too. Northern Virginia tends to have higher prices because there’s more demand and costs are higher in general. 

If you’re in a more rural area, you might find better deals. 

Travel time to your location can affect pricing too – if you’re far from your installer’s base of operations, they might add a travel fee.

#9 HOA Regulations

If you live in an HOA community, check their rules first. Some HOAs have specific requirements about what kinds of lights you can use or when they can be installed. 

Sometimes you’ll need extra permits, which can add to your costs. 

HOAs might also restrict certain colors, limit the hours lights can be on, or require specific types of mounting hardware.

#10 Custom Requests

This one is obvious – custom requests will cost more.

Custom designs, special color combinations, themed displays or one-of-a-kind displays will usually add 20-30% to your bill. 

This might include creating custom light patterns, more electrical work, matching specific color schemes, or designing displays that incorporate unique features of your home. 

Bottom Line

Dominion Lightworks

Professional Christmas light installation in Virginia costs around $2.50 to $7 per linear foot.

But here’s the thing: you’re paying for convenience, safety, and a professional job. You won’t have to climb any ladders, and you’ll get a holiday display that’ll have your neighbors asking who did your lights.

Plus, you won’t have to worry about storing all those lights when the season’s over.

Want to get the best deal? Book early, go with LED lights (they’ll save you money in the long run), and check out available discounts. 

Cat Chewing On Christmas Lights

If you’re reading this, chances are you’ve got a cat and you’re gearing up for the holidays. 

Putting up Christmas lights when you have a curious kitty can be a bit of a challenge. You might have noticed your furry friend eyeing those twinkling lights with a little too much interest. 

Don’t worry, you’re not alone in this.

In this post, I’ll explain why cats like chewing on Christmas lights, how dangerous it is, and how to make them stop.

Why Do Cats Chew On Christmas Lights?

Cats are naturally curious creatures. 

To them, these strings of lights might look like the most exciting new toy in town. The way they move slightly or catch the light can trigger that hunter instinct our cats have. 

And let’s not forget, some cats just love to chew on things, and those wires might feel pretty good on their teeth.

Some kitties might even be drawn to the warmth of the lights or just intrigued by this new thing that’s suddenly appeared in their territory.

Also Read: LED Christmas Lights Dim

How Dangerous Is It For A Cat To Chew On Christmas Lights?

Chewing on Christmas lights can be extremely dangerous for a cat. The biggest risk is electrocution which can cause nasty burns in your cat’s mouth or, in the worst case, be fatal. 

This risk goes up if you’re using older lights with wires that might be wearing thin. 

But that’s not all. If your kitty manages to break a bulb, they could end up swallowing sharp pieces of glass or toxic chemicals found in some lights. 

Even if nothing bad happens right away, a cat that keeps chewing on wires could damage them enough to start an electrical fire in your home.

How To Cat Proof Christmas Lights

Don’t worry, you don’t have to choose between your cat and your Christmas spirit. There are plenty of ways to keep cats from chewing christmas lights:

#1 Keep Lights Higher

This one’s pretty straightforward. If your cat can’t reach the lights, they can’t chew on them. 

Try decorating the upper parts of your Christmas tree or hang lights up high in your room. 

You might have to skip putting lights on the lower branches or along the floor, but it’s worth it.

Also Read: Can you cut christmas lights

#2 Cover Wires

Exposed wires are like an invitation for curious cats. So, let’s hide them! 

You can buy cord covers or tubing made for electrical wires.They come in different colors, so you can match them to your decorations.

These covers will make the wires harder for your cat to get at and less fun to chew on.

If you want to go the extra mile, try wrapping the wires in aluminum foil. Most cats aren’t fans of how it feels or sounds. Or try split loom tubing.

Bonus: it makes your light display look super neat and organized.

#3 Use Deterrent Sprays

Cats have strong opinions about smells, and we can use that to our advantage. 

There are sprays out there that cats really don’t like – like citrus or bitter apple. Spray these around your lights (not on them), and your cat might decide they’re not so interesting after all. 

Just remember to reapply the spray every now and then, especially if you notice your cat getting curious about the lights again.

Some people even switch between different scents to keep their cats guessing.

#4 Create A Barrier

Sometimes, the best defense is a good offense. 

Put something between your cat and the lights. You could use a tree skirt or a little fence around your Christmas tree. They look festive and keep the kitty out.

Or you can keep the tree in a room that can be closed off when you’re not home.

For other light displays, try clear plastic sheets or decorative screens. This way, you can still see and enjoy your lights, but your cat can’t get to them.

Also Read: No plug outside for christmas lights

#5 Unplug When Not in Use

Here’s an easy one – when you’re not around to keep an eye on things, unplug those lights. 

No power means no risk of your cat getting shocked, and cool wires are less interesting to cats than warm ones. And it saves energy too, which is always a plus. 

Make it a habit to unplug before you leave the house or go to bed.

If you’re forgetful (no judgment here), try getting smart plugs or timers. They can turn your lights on and off automatically.

#6 Negative Reinforcement

Now, we usually prefer to reward good behavior in cats, but sometimes you need to discourage the bad stuff, especially when it’s dangerous. 

This doesn’t mean punishing your cat, just making them associate the lights with something they don’t like.

You could use a spray bottle to give them a little spritz of water if they go for the lights, or make a loud noise to startle them away.

#7 Use Low-Voltage Lights

Have you thought about switching to LED Christmas lights?

They use less power, don’t get hot, and come in all sorts of colors and styles. This means if your cat does manage to get to them, the risk is much lower. 

Plus, many LED sets have cool features like dimming or different light patterns. 

You might even find a setting that your cat finds less interesting, which is a win-win.

Wrapping Up

Keeping your cat from chewing on Christmas lights takes a bit of work, but it’s totally doable. 

Mix and match these strategies to find what works best for you and your cat. Remember, no single method is perfect, so keep an eye on how your cat behaves around your decorations. 

If your kitty just won’t leave those lights alone, it might be time to rethink your decorating style.

FAQs

Can A Cat Get Electrocuted From Chewing On Christmas Lights?

Yes, a cat can get electrocuted from chewing on Christmas lights. The electrical current running through the lights can cause serious injuries or even be fatal.

Cat Ate Christmas Light Bulb

If your cat ate a Christmas light bulb, call your vet right away. The glass could hurt their mouth, throat, and stomach.

Do Cats Like Christmas Lights?

They don’t necessarily like Christmas lights, but some cats may be curious about them and may try to play with or chew on them.