
95+ 5-Star Reviews in the Central Virginia Area

7 Awesome Lights For Long Driveways

So, you’ve finally got that long, sprawling driveway you always wanted. 

It’s got curb appeal for days and gives you that nice bit of distance from the main road, but there’s just one tiny problem: once the sun goes down, it’s basically a black hole.

The good news is that lighting up a big entrance doesn’t have to feel like a massive industrial chore. 

It’s actually one of the quickest ways to make your property look like a high-end estate!

In this post, we’ll go over some of the coolest and most stylish lights for long driveways.

#1 Architectural Bollard Lights

If you want your driveway to look like it belongs to a high-end boutique hotel or a modern museum, bollard lights are the way to go. 

These aren’t your tiny little plastic stakes from the big-box store; they’re sturdy, waist-high posts that stand like little sentinels along the edge of your path. 

The beauty of architectural bollards is that they are design pieces in their own right.

Because they sit higher up, the light spread is much wider than smaller lamps, which is a huge win for a long driveway. You don’t need fifty of them to get the job done; you can space them out quite a bit and still have a clear, safe path. 

They cast a lovely, controlled glow downwards so you aren’t blinding yourself as you drive, and they handle bad weather like absolute champs.

long driveway lights

Also Read: How To Design Landscape Lighting

#2 Recessed “Drive-Over” Ground Lights

Now, if you’re a fan of that sleek, “runway” look, you have to check out recessed ground lights. 

These are literally built into the driveway or the pavers themselves. 

It looks incredibly high-tech, almost like a private jet is about to land in your garage. 

The best part is that they are specifically designed to be “drive-over” rated, so if you accidentally clip one with your SUV, it’s no big deal.

These are fantastic for defining the edges of the pavement without adding any physical clutter to your landscaping. If you have a winding driveway with sharp turns, placing these at the apex of the curves makes navigating at night a total breeze. 

They provide a nice upward wash of light that catches the tires and the edge of the grass, giving you a clear boundary that stays out of the way of the lawnmower.

#3 Smart Solar Pathlights (Ring / Philips Hue)

I know what you’re thinking: “Solar lights? Those never stay bright!” 

But hold on, because the tech has come a long way. If you go with a smart system like Ring or Philips Hue, you’re getting a totally different experience. 

These aren’t the cheap-o lights that die after two hours of darkness. 

These are high-performance units that sync up with your phone and your home’s smart ecosystem.

The real magic here is the “smart” part. You can set them to stay dim to save energy and then kick up to full brightness the second your car pulls in or the motion sensor detects movement. 

It’s a great way to handle a long driveway without having to dig a thousand-foot trench for electrical wires. 

You just stake them in, let them soak up the sun, and control the whole thing from your couch.

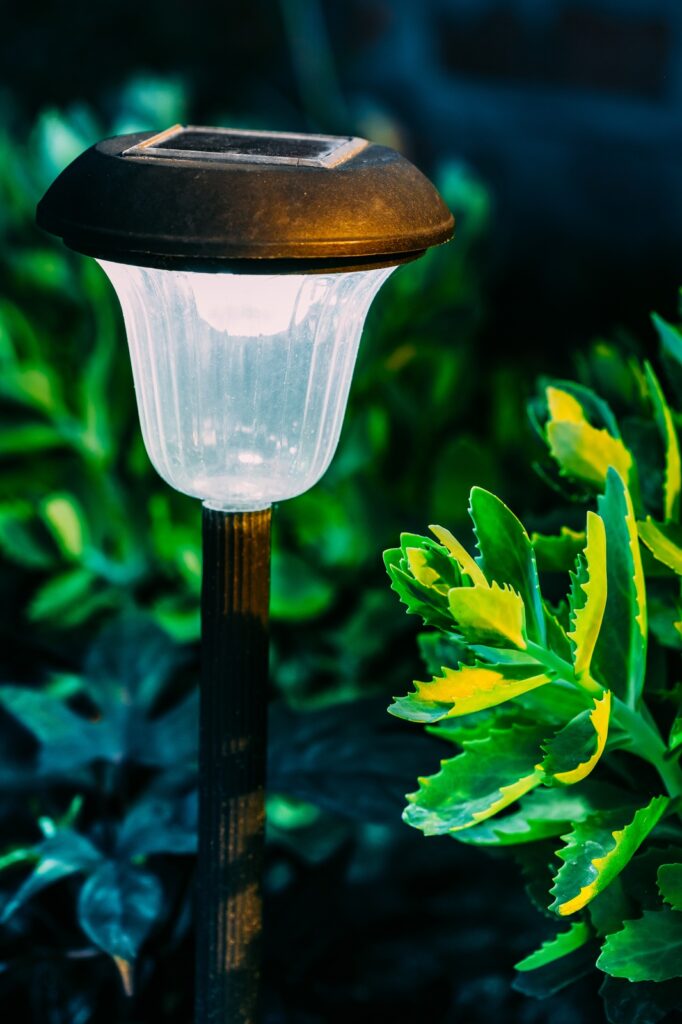
Also Read: How To Clean Solar Panels On Garden Lights

#4 Moonlighting (Downlighting From Trees)

Moonlighting is one of the most natural-looking ways to light a long driveway, and it’s also one of the most underrated.

If your driveway is lined with big, beautiful trees, you can actually mount lights high up in the branches and point them straight down. This creates an effect called “moonlighting.” 

It mimics the soft, filtered glow of a full moon shining through the leaves, casting beautiful shadows on the pavement below.

It’s way less “industrial” than standard streetlights and adds a ton of depth to your property. 

Instead of just seeing a lit path, you see the texture of the trees and the whole landscape. 

It’s incredibly romantic and soft on the eyes, plus it keeps the light fixtures hidden so the focus stays on your beautiful yard rather than the hardware.

lighting ideas for long driveway

#5 High-Lumen Motion Sensor Floodlights

Sometimes, you just need raw power. 

If your driveway is particularly dark or if security is your main concern, a high-lumen motion sensor floodlight is a must-have. 

These are the heavy hitters. You usually mount them on the garage or a dedicated pole, and they act as the “main event” when you arrive home.

The modern versions are much smarter than the old ones that used to flicker every time a moth flew by. You can adjust the sensitivity and the range so they only pop on when a vehicle enters the frame. 

It provides that instant “I’m safe” feeling when the whole area floods with light the moment you turn off the main road. 

It’s a simple, effective, and very practical addition to any long-distance setup.

Also Read: How Many Christmas Lights For A 6ft Tree?

#6 Low-Voltage 12V Brass Path Lights

Low-voltage brass path lights are a classic for a reason. They’re reliable, warm, and they age beautifully over time. 

That natural patina gives long driveways a lived-in, welcoming feel instead of a showroom look.

Because they run on 12 volts, they’re energy-efficient and safe, even when installed close together. You can stretch a run of these down a long driveway and still keep everything consistent and easy to maintain.

Here’s why they’re such a solid choice:

  • Warm, inviting light that doesn’t feel harsh
  • Durable brass construction that handles weather well
  • Easy expansion if you want to add more lights later

They’re especially good for traditional homes, farmhouse styles, or anyone who wants a timeless look that won’t feel dated in five years.

#7 RGBW Smart Linear Strips

If you’re feeling a little adventurous and want to lean into the modern aesthetic, smart linear strips are incredibly cool. 

These are flexible, weather-proof LED ribbons that you can tuck along the underside of a curb or the edge of a flower bed running parallel to the driveway. 

It creates a continuous “line of light” rather than individual spots.

Since these are RGBW, you can change the color whenever you feel like it. You can have classic warm white for every day, but then flip them to orange for Halloween or green and red for the holidays with a single tap on your smartphone. 

It’s a total “wow factor” move that makes your home stand out in the best way possible.

Bottom Line

Lighting a long driveway works best when it’s layered, not blasted with brightness. 

Mix soft guidance lights with a few functional fixtures and suddenly the whole space feels intentional instead of dark or overdone.

Bollards, path lights, moonlighting, and smart options are all great lights for long driveways and they bring something different to the table. The magic happens when you combine a couple styles that fit your space and how you actually use it.

Keep it comfortable, keep it balanced, and let the driveway feel welcoming instead of overwhelming. 

When the lights come on and everything just feels right, you’ll know you nailed it.

12V Vs 15V Landscape Lighting (Compared)

Landscape lighting sounds simple at first. Pick some lights, run a little wire, plug in a transformer, and enjoy the glow.

Then you hit the fork in the road: 12V or 15V. 

Suddenly it feels more technical than expected.

Both options are low-voltage, both are commonly used, and both can make your yard look great at night. The real difference shows up once you start thinking about brightness consistency, wire runs, and future upgrades. 

In this post, we’ll compare 12V vs 15V landscape lighting to help you figure out what to use.

#1 Brightness And Performance

A 12V bulb and a 15V bulb (if they are rated for those specific voltages) are going to look pretty much identical to your eyes if they are getting the exact amount of juice they need.

The difference starts showing up as your wire runs get longer and your layout gets more ambitious.

12V systems are designed to deliver a steady, comfortable level of brightness. They work beautifully for small to medium yards where lights aren’t spaced far apart. 

15V systems bring a little extra muscle. 

That extra voltage helps push power farther down the line, so fixtures at the end of a long run stay brighter instead of fading out.

  • 12V works great for compact landscapes and straightforward designs
  • 15V holds brightness better on long wire runs and larger yards

Neither option is “too bright” by default. The fixtures and bulbs matter more than the voltage itself. The voltage mainly decides how well that brightness holds up across your yard.

15v vs 12v landscape lighting

Also Read: Where To Place Landscape Lighting?

#2 Voltage At The Fixtures

This is where things get slightly technical, but stick with me, it’s not bad.

Electricity loses energy as it travels through wire, a phenomenon we call “voltage drop.” 

If you start with 12V at the house, you might only have 10.5V by the time you reach the oak tree in the back corner.

Most LED fixtures are actually pretty smart these days and can handle a range, usually anywhere from 9V to 15V, without flickering. 

However, if you start with a 15V output, you have more “room to lose.” You can run longer lines or add more lights to a single cable because you’re starting with a higher ceiling. This is why 15V setups are popular for big yards, long pathways, or lighting that wraps around a property.

You just have to be careful not to hit a fixture with a full 15V if it isn’t designed for it, or you might end up frying the delicate electronics inside.

#3 Bulb Lifespan

Bulb life is closely tied to voltage, and this is where people sometimes get nervous about 15V systems.

Running a bulb above its rated voltage can shorten its lifespan. 

That’s true. But modern landscape lighting systems are designed with this in mind. Many fixtures and LED bulbs are built to handle small voltage fluctuations without issue.

In a properly designed setup:

  • 12V bulbs tend to last exactly as expected
  • 15V systems don’t automatically shorten bulb life if fixtures are rated correctly

The real danger isn’t the system voltage itself. It’s poor planning. Over-volting fixtures right next to the transformer, mixing incompatible bulbs, or skipping voltage calculations can cause problems in any system.

When things are matched correctly, bulb lifespan stays very reasonable on both sides.

#4 Wire Gauge

Wire gauge plays a bigger role than most people expect.

With 12V systems, thicker wire often becomes necessary as distances increase. Thicker wire reduces resistance, which helps fight voltage drop. 

That’s great for performance, but thicker wire costs more and can be harder to work with.

15V systems can often use slightly thinner wire for the same distance because the higher voltage helps overcome resistance. This gives you more flexibility when planning your layout, especially for larger projects.

This doesn’t mean thin wire is always better. 

It just means 15V gives you more options before wire size becomes a limiting factor.

Also Read: What Gauge Wire For Landscape Lighting?

#5 Replacements

When a bulb eventually goes dark, you want to be able to run to the local hardware store and grab a new one without a headache. 

12V is the absolute winner here. 

12V landscape lighting is everywhere. Fixtures, bulbs, transformers, connectors – you can find them at big-box stores, online shops, and specialty lighting suppliers without much effort.

Should I Get 15V Or 12V Landscape Lighting

If you’ve set up a specialized 15V system, finding direct replacements can be a bit of a treasure hunt. 

You might end up stuck ordering specific parts online and waiting a week for shipping while your front porch stays in the dark. 

Sticking with 12V at the actual fixture (even if your transformer is pushing 15V to get it there) is definitely the path of least resistance for future-you.

#6 Compatibility

Compatibility ties directly into replacements, but it deserves its own moment.

Most landscape lighting fixtures are designed around 12V systems. That makes mixing brands and upgrading pieces later much easier. 

You can swap fixtures, test different styles, or expand sections without overthinking it.

15V systems require more attention. Fixtures and bulbs must be rated to handle the higher input voltage. Many modern LEDs are designed to handle a range, but it’s something you always need to double-check.

This makes 15V less forgiving if you like to mix and match.

#7 Cost Of Transformers And Gear

Upfront cost is another deciding factor for a lot of homeowners.

Generally speaking, a transformer that offers multiple “taps” (like 12V, 13V, 14V, and 15V) is going to cost you a bit more than a simple 12V-only box. 

These are often called “multi-tap” transformers, and they are the gold standard for pro installs.

12V transformers are widely available and usually cheaper. The competition keeps prices reasonable, and you can find options at almost every price point.

That said, you might save money elsewhere, especially on wire, if your layout is large.

So the cost conversation usually balances out like this:

  • 12V has lower upfront equipment costs
  • 15V can reduce extra spending on heavy-gauge wire for long runs

The total price really depends on yard size and layout, not just voltage alone.

Also Read: C7 Vs C9 Christmas Lights

#8 Installations

This is where 15V quietly shines.

12V systems reward careful planning. You’ll want to think about wire lengths, zones, and fixture placement early on. Changes later might require thicker wire or additional transformers.

15V systems are more forgiving. You get more breathing room to adjust spacing, add fixtures, or extend runs without reworking everything. 

This makes them appealing for homeowners who like to tweak their lighting over time or expect future expansions.

If you love flexibility and hate redoing work, that extra voltage can feel like a safety net.

Should I Get 15V Or 12V Landscape Lighting?

For most people, the answer is actually “both,” but in a specific way. 

You should buy a transformer that has a 15V tap, but use 12V-rated fixtures. This gives you the best of both worlds. 

You get the ease of finding bulbs and the lower cost of 12V gear, but you have the power of the 15V tap to make sure that juice actually makes it to the lights at the edge of your property.

If you have a tiny front yard with only three or four lights, a 15V system is total overkill. You’ll never have enough wire for voltage drop to even matter. 

But if you’re planning a backyard oasis with path lights, uplights on the trees, and maybe some deck lighting, you will definitely regret not having that 15V option when things start flickering.

Bottom Line

The main difference between 12V and 15V landscape lighting is that 12V is the standard voltage for fixtures and is better for short runs, energy efficiency, and bulb availability. 

15V, on the other hand, is better for overcoming voltage drop on long wire runs, powering a higher number of fixtures on a single line, and providing installation flexibility, but it requires a more expensive multi-tap transformer and careful management to avoid overheating bulbs.

How To Clean Solar Panels On Garden Lights (Guide)

Solar garden lights are one of those things you set up once and then kind of forget about. They look great lining a walkway or lighting up a flower bed, and when they work, you never think twice. 

Then one day they’re dim, half of them don’t turn on, or they shut off earlier than they used to. 

Nine times out of ten, the problem isn’t the battery or the light itself. It’s the solar panel.

Solar panels on garden lights sit outside all day, collecting dust, pollen, dirt, bird droppings, and whatever else the weather throws at them. When that layer builds up, sunlight can’t get through properly, and the light just doesn’t charge like it should. 

The good news is cleaning them is simple, quick, and doesn’t require any special tools or skills.

In this post, we’ll show you how to clean solar panels on garden lights like a PRO.

Gather What You’ll Need

Before you head outside, grab these items. You probably already have everything lying around the house, which is part of what makes this so easy:

  • Soft cloth or microfiber towel
  • Small bowl of warm water
  • Mild dish soap
  • Soft toothbrush or small paintbrush
  • Dry towel

That’s it. No harsh cleaners, no power washers, and no fancy sprays. 

In fact, strong cleaners or abrasive pads can actually scratch the solar panel, which makes it collect dirt faster in the future and charge less efficiently. Simple really is better here.

can I clean garden light solar panels

Also Read: Can’t Open Outdoor Light Fixture

#1 Turn The Lights Off And Remove Them

This step feels obvious, but it’s worth saying out loud. 

Turn the lights off before you start cleaning. Most solar garden lights have a small switch under the top or inside the battery compartment. Flip that off first.

Once they’re off, gently remove them from the ground or from their mounting spot. 

Cleaning is much easier when you’re not bent over trying to wipe a panel that’s still stuck in the soil. You’ll also avoid getting water into places it shouldn’t go.

If your lights are staked into the ground, pull them straight up and set them on a towel or table nearby. 

If they’re mounted on a wall or fence and easy to remove, take them down. If not, just be extra careful with water around the housing.

#2 Wipe Away Loose Dirt First

Before adding any water, deal with the loose stuff. 

This is the dust, pollen, and dry debris that usually sits right on top of the panel.

Take your dry cloth or soft brush and gently wipe the surface of the solar panel. You don’t need pressure here. Let the cloth do the work. Pay attention to the edges too, since dirt loves to collect around the frame.

Sometimes this step alone is enough to fix dim lights, especially after a dry, dusty stretch or pollen season. You might be surprised how much brighter the panel looks after a quick dry wipe.

#3 Clean With Mild Soap And Water

If the panel still looks cloudy or has stuck-on grime, it’s time for a deeper clean.

Mix warm water with a drop or two of mild dish soap. Dip your cloth into the water, wring it out so it’s damp rather than dripping, and gently wipe the solar panel. 

Small circular motions work well and help lift grime without scratching.

For corners, seams, or textured surfaces, use the soft toothbrush or paintbrush. Go slow and keep the pressure light. You’re cleaning a delicate surface, not scrubbing a grill.

If you see bird droppings or sap, let the damp cloth sit on the spot for a few seconds before wiping. 

That usually loosens it enough without needing extra force.

Also Read: C7 Vs C9 Christmas Lights

#4 Rinse And Dry

Soap residue can block sunlight just as much as dirt, so rinsing matters more than people think.

cleaning solar panels on garden lights

Take a clean cloth dampened with plain water and wipe the panel again to remove any leftover soap. Make sure the surface feels smooth and doesn’t look streaky.

After rinsing, dry the panel completely with a towel. Don’t let it air-dry in direct sunlight, since water spots can form and reduce efficiency.

A quick wipe with a dry cloth leaves the panel clear and ready to charge.

#5 Check The Rest Of The Light

While you have the light in your hands, take a minute to look over the rest of it. 

This small check can save you frustration later.

Wipe dirt off the light cover so the bulb shines clearly at night. Check the base for packed-in mud or grass clippings. If the battery compartment is accessible, make sure it’s dry and clean.

Also look at where the light normally sits. 

Plants grow, mulch piles up, and shadows change over time. A clean solar panel won’t help much if it’s shaded most of the day by bushes or tall grass.

#6 Put The Lights Back In Full Sun

Once everything is clean and dry, put the lights back where they belong. 

Make sure the solar panel is facing upward and getting as much direct sunlight as possible.

Turn the lights back on and give them a full day to charge before judging the results. Solar lights often need several hours of strong sun to reach their full brightness again, especially if they’ve been struggling for a while.

That first night after cleaning is usually when you notice the biggest difference.

Also Read: Christmas Lights Stopped Working

How Often To Clean Solar Panels On Garden Lights?

Most people do fine cleaning their solar garden lights every two to three months

If you live in a dusty area, deal with heavy pollen, or have lots of trees and birds around, monthly cleaning can make a noticeable difference.

It’s also a good idea to clean them after major weather events, like long dry spells, storms that kick up debris, or heavy pollen seasons. 

Anytime the lights look dim or stop staying on as long as they used to, checking the panels should be your first move.

Bottom Line

Cleaning solar panels on garden lights is one of those small tasks that pays off immediately. 

A few minutes with a soft cloth, mild soap, and some water can bring dull, unreliable lights back to life. No special tools, no complicated steps, and no guesswork.

If your garden lights aren’t shining like they used to, don’t replace them right away. Clean the panels first, give them a good day in the sun, and see what happens. 

Most of the time, that’s all they needed.

FAQs

Will WD 40 Clean Solar Lights?

No, and it’s not a good idea. 

WD-40 is made for loosening metal parts and displacing moisture, not for cleaning solar panels. Spraying it on the panel can leave a greasy film that actually blocks sunlight, which makes the light charge worse, not better. 

Over time, that residue can attract more dirt and dust too.

Can You Clean Solar Lights With Toothpaste?

Yes, but it’s usually not worth it.

Toothpaste is mildly abrasive, so some people use it to polish cloudy plastic covers. The risk is that it can scratch the solar panel surface, especially if you rub too hard or use a gritty formula. 

Those tiny scratches reduce how much sunlight gets through.

Can’t Open Outdoor Light Fixture? Here’s What To Do

You walk outside with a new bulb in hand, ready to swap it in. But when you reach for the outdoor light fixture… nothing budges. It’s stuck.

No screws in sight. Won’t twist. Won’t pull. Annoying, right?

Don’t worry – this is more common than you think. 

Outdoor lights get exposed to rain, sun, bugs, and years of grime. It’s no surprise they can be hard to open. But you don’t need to break out the crowbar just yet. 

In this quick step-by-step guide, we’ll help you figure it out without breaking anything.

#1 Identify The Type Of Fixture

First things first, take a step back and look at what kind of fixture you’re dealing with. 

Is it mounted on a wall, hanging from the ceiling, or sitting on a post? That little detail makes a big difference in how the fixture comes apart.

Wall-mounted lanterns often open from the bottom or side. Ceiling lights might have twist-off glass domes. Post lights can lift off or unscrew from the top. 

If you’re not sure, try to spot how the glass is held in place. Sometimes it’s framed in metal, sometimes it’s just threaded in. Just knowing the style can save you a lot of frustration. 

Identify The Type Of Outdoor Light Fixture

Don’t force anything until you’ve figured out the likely opening method.

Also Read: Alternatives To Recessed Lighting

#2 Check For Hidden Screws Or Clips

Many outdoor fixtures have screws or clips that aren’t immediately obvious. They might be hiding under a decorative cap, or tucked away in a spot you wouldn’t normally look at.

Run your fingers along the edges of the fixture. Feel for any small bumps, indentations, or raised areas that might indicate a screw head. 

Sometimes these screws are painted over so many times they just look like part of the fixture.

Check the top of the fixture too. Some have screws or clips up there that hold the whole thing together. Don’t forget to look inside the fixture if you can see in there. Sometimes there are screws or clips on the inside that you can reach.

If you find screws, try turning them counterclockwise.

#3 Try A Gentle Twist

Still no screws? It might be a twist-lock style.

Some fixtures are designed to screw on and off with a simple turn, usually counterclockwise. This is common with dome-shaped or globe-style lights. 

Try placing your hands on opposite sides of the glass and giving it a gentle twist.

Please be gentle. Don’t crank on it like you’re opening a stuck pickle jar. If it’s stuck, forcing it too hard can crack the glass or bend the metal. Just try a firm, steady twist.

If counterclockwise doesn’t work, try clockwise. Some fixtures are reverse-threaded, especially if they’re in a location where vibration might cause them to loosen over time. It’s not common, but it happens.

Also Read: Is Landscape Lighting Worth It?

#4 Check For Corrosion Or Paint Sealing

Outdoor fixtures live rough lives. Rain, dirt, sun, and years of temperature changes can cause corrosion or rust. On top of that, if the fixture’s ever been painted, especially by someone in a hurry, it might be sealed shut with dried paint.

Run your fingers around the edges. Feel for rough spots, stiffness, or paint crust. Look closely where the glass meets the frame or where the housing meets the wall. 

If you see a line of paint sealing the parts together, it needs to be cut.

Use a utility knife or razor blade to gently score the paint along the seam. Don’t jab it in – just trace the edge lightly. That can break the seal without damaging the fixture.

Why Can't I Open My Outdoor Light Fixture

For rust or corrosion, a little spray of WD-40 or penetrating oil can help. Spray it along the seam, wait 10–15 minutes, then try again. 

Sometimes that’s all it takes.

#5 Use Rubber Gloves Or A Jar Opener

Once you’ve done all the inspecting and spraying, grab something for grip.

Rubber gloves (like the kind you use for cleaning) can give your hands the extra traction they need. You’ll get a much better grip on slick or smooth glass.

If you’ve got one of those rubber jar opener pads or a strap wrench, even better. Wrap it around the fixture and try a slow twist. 

These tools help apply even pressure all the way around, so you’re less likely to crack anything.

Just go slow. Steady pressure, not brute force.

#6 Search The Brand Or Manual

Still can’t open the outdoor light fixture? Try to figure out the brand or model of your light. 

Check the base, the mounting plate, or the inside of the fixture. There’s often a label somewhere with a model number or manufacturer name.

Once you have this information, head to Google. Search for the brand name and model number along with terms like “how to open” or “replacement parts.” 

You’d be surprised how often you can find specific instructions for your exact fixture.

Also Read: What Gauge Wire For Landscape Lighting?

Don’t forget to check YouTube too. There are tons of DIY videos showing how to open specific types of fixtures. Even if you can’t find your exact model, you might find something similar that gives you the right idea.

Some fixtures have sneaky designs that only make sense once you see a demo.

Many manufacturers also have customer service lines or online support. If you can identify the brand, give them a call, and see if they can help.

There’s no shame in looking it up since some of these things were engineered by people who clearly don’t change their own light bulbs

Still Can’t Open It? Here’s What Next

If you still can’t open outdoor light fixture, consider calling a handyman or electrician. Sometimes it’s worth paying someone else to deal with the frustration. 

They have experience with all types of fixtures and might know a trick you haven’t thought of.

If the fixture is really old or damaged, it might be time to replace it entirely. 

Sometimes the cost of fighting with a stubborn fixture isn’t worth it, especially if a new one would look better anyway.

As a last resort, you might need to cut the fixture off. This obviously destroys it, but sometimes that’s the only way. If you go this route, be extremely careful and consider turning off the power at the breaker first.

Bottom Line

Outdoor light fixtures are simple… until they’re not.

A stuck or sealed fixture can test your patience, but most of the time, it just takes a little time, a careful look, and the right touch.

Start by figuring out the type of fixture you’ve got. Look closely for screws, clips, or signs of paint sealing. Try gentle twists. Use gloves for grip. Spray some WD-40 if needed. And don’t be afraid to look up a video.

If all else fails, replacing the fixture might save you more time than fighting with it.

How Much Does Bistro Lighting Cost In Virginia?

You know that soft, golden glow that makes patios feel like magic? That’s bistro lighting. It’s the kind of simple upgrade that totally changes the vibe of a space!

But before you start daydreaming about late-night drinks under the lights, let’s talk dollars.

Bistro lighting looks effortless, but there’s a bit more going on behind the scenes. Materials, setup, power – you’ve got a few things to think about before hanging that first strand.

In this post, we’ll break down how much does bistro lighting cost. And we’ll also give you a rundown of our prices.

Our Virginia Bistro Lighting Prices

For most homes, our standard bistro lighting installs come in under $1,000

We usually hang the strands between your house and nearby trees, which keeps the setup simple and cost-effective. But if your space needs anchor points, we charge $250 per point to install those.

Looking for something a bit more fun? Our RGB bistro lighting, which lets you change colors and set the mood. These range from $1,500 to $3,000, depending on the layout and coverage.

We’ll take a look at your yard and give you a clear quote based on what you’re trying to light up.

Also Check Out Our: Richmond Landscape Lighting Design & Installation Services

How Much Does Bistro Lighting Cost?

Professional bistro lighting installs cost somewhere between $15 and $30 per linear foot. That number covers everything – lights, mounting gear, labor, and sometimes even basic wiring.

So, if you’re lighting a 60-foot patio perimeter, you’re probably looking at $900 to $1,800.

bistro lighting cost

For more complex or high-end setups (like commercial spaces or heavy-duty weatherproof systems), the price can climb to $35 – $45+ per foot.

Now if you’re handy and want to DIY the whole thing, your cost drops quite a bit. Materials alone usually run about $4 – $8 per foot, depending on the quality of the lights and hardware you choose.

Here’s a quick example to help visualize it:

  • Small patio (50 ft): $750–$1,500 (DIY around $250–$400)
  • Medium backyard (100–150 ft): $1,500–$4,000 (DIY around $400 – $1,000)

Factors That Affect The Cost Of Bistro Patio Lighting

Let’s go over the factors that affects how much does bistro lighting cost:

#1. Size Of The Area

The size of the area you want to light up is probably the most obvious factor. 

A small backyard patio will require fewer lights, fewer fixtures, and less wiring than a massive deck or an entire restaurant patio. 

For example, if you’re working with a tiny balcony, you could get away with just a few strands. But for a large backyard or commercial space, you’ll need a lot more.

The bigger the area, the more material and labor you’ll need, which drives up the cost.

And remember, it’s not just the length – it’s also how densely you want the lights strung. Tighter spacing means more strands, which bumps up the cost.

Also Read: How Much Do Trim Lights Cost In Virginia?

#2. Type And Quality Of Lights

There’s a world of difference between the budget stuff at the hardware store and heavy-duty commercial-grade bistro string lights. 

Cheaper options might look good for a season but don’t expect them to last. 

On the other hand, high-quality lights have thicker wiring, weather-resistant sockets, and longer-lasting bulbs. Expect to pay more for things like:

  • Commercial-grade LED bulbs
  • Shatterproof glass bulbs
  • Weatherproof sockets and lines

These cost more up front, but you get better durability, brightness, and energy efficiency. 

Plus, you’ll thank yourself later when you’re not climbing a ladder every other weekend fixing busted bulbs.

#3. Mounting Requirements

Another thing to think about is how and where you’ll be hanging the lights. 

Are you stringing them between trees or along a fence? 

Or do you need to install posts or mounts to hang them up? 

For example, if you’re attaching them to your house or a structure, it’s usually easier and cheaper to install. But if you need poles or extra mounting hardware, that can increase how much bistro lighting costs.

Factors That Affect The Cost Of Bistro Lighting

If you’re going for a more customized setup, like suspending lights in a pattern or hanging them high up, that will also require extra time, effort, and materials, which translates to a higher cost.

Also Read: How To Design Landscape Lighting

#4. Control Options

Do you want your bistro lights to be smart? Many people are opting for smart lighting systems, which let you control the lights via an app or voice command (Google Assistant or Alexa). 

These systems can be a little pricier, but they also offer more convenience.

For example, with smart lighting, you can adjust the brightness, set timers, or change the colors without ever leaving your couch. 

It’s a neat touch for people who want their outdoor lighting to be high-tech. But don’t forget, more sophisticated control systems add to the total cost.

#5. Power Source And Electrical Work

How your bistro lights get their power matters too.

If there’s already an outdoor outlet close by, great – you’ll save a chunk of change. 

But if not, you need to hire an electrician to add one or run wiring safely. That’s an extra few hundred bucks depending on how far the power needs to travel or how complicated the job is.

Some setups also include junction boxes, timers, or low-voltage transformers. Those extras add convenience, but they also come with a price tag. 

And don’t forget about waterproofing and safety! Outdoor setups need proper covers and protection from the elements.

#6. Labor Rates In Your Area

Labor makes up a big chunk of the total cost of patio Bistro lights.

If you’re doing a DIY bistro lighting setup, then you won’t need to worry about this.

But if you’re hiring a professional to install the lights, keep in mind that labor rates in Virginia vary by location and the complexity of the installation.

Labor costs in urban areas like Richmond or Virginia Beach might be more expensive than in rural areas. Plus, if the installation requires special equipment (like a lift for hanging lights in tall trees), expect the cost to go up even more.

Also, some companies charge a flat fee per project, while others bill by the hour or foot. So be sure to ask how they calculate their estimate.

#7. Permits And HOA Requirements

Last thing to keep in mind – permits and HOA rules. 

Most residential installs don’t require a permit, but it depends on your local code. These permits typically involve some paperwork, a fee, and possibly an inspection.

And if you live in a community with an HOA, they might have rules about outdoor lighting, visibility, or structure height.

In some places, you’ll need approval before installing anything permanent, like poles or wiring. That can delay your project or add extra costs if drawings or revisions are needed. 

It’s not super common, but it’s something to keep on your radar.

Bottom Line

Bistro lighting can cost anywhere between $15 to $30 per foot.

Your final price will depend on the area you’re lighting, the kind of lights you choose, how you want to mount them, and a few other factors.

The good news is that once it’s up, it’s done. No daily maintenance, no batteries to swap out. Just flip the switch and enjoy that perfect glow night after night.

How Much Do Trim Lights Cost In Virginia?

Thinking about lighting up your house with permanent trim lights?

You’re not alone. More and more homeowners in Virginia are ditching the ladders and tangled holiday lights for a clean, year-round setup that looks amazing in every season.

These lights are sleek, smart, and built to last. Plus, they take your curb appeal up a notch – without any extra work once they’re up.

But let’s get real: one of the first things you probably want to know is how much this all costs.

In this post we’ll shed some light on how much trim lights cost, and the factors that affect your final bill. We’ll also break down our permanent trim lighting prices.

How Much Does Trim Lights Cost?

Trim light installations cost somewhere between $20 and $35 per linear foot in Virginia.

So, for a house with about 150 feet of roofline, you’re looking at a ballpark of $3,000 to $5,250.

If your house has more corners, levels, or extra trim, that number can climb. Bigger homes with around 250 to 400 feet of roofline might land in the $6,000 to $12,000 range.

DIY kits are an option too. You can save money upfront, but it means handling everything yourself like ladder work, wiring, mounting, and making it all look clean. Materials alone for DIY usually cost around $12 to $18 per foot, depending on the quality you go for.

So in short:

  • Pro install (with materials and labor): $20 – $35 per foot
  • DIY (materials only): $12 – $18 per foot
  • Small homes: $3,000 to $5,000
  • Larger homes: $6,000+ and up

Let’s get into what makes that number go up or down in a sec.

How Much Does Trim Lights Cost

Also Read: How Much Does Christmas Light Installation Cost?

Our Permanent Trim Light Prices

At Dominion Lightworks, we offer two main types of permanent trim lighting:

  • Outward-facing
  • Under-soffit lighting

Both look great, and both fall in about the same price range. Most of the time, you can expect to pay between $25 and $35 per linear foot, depending on how complex the install is.

Things like the number of cuts, angles, roof breaks, and dormers can affect the total. So, homes with simpler rooflines tend to be on the lower end of that range.

Most residential jobs can expect to spend $2,500 – $4,500 on the front fascia.

Factors That Affect The Cost Of Trim Lights

There are quite a few things that play into the final price. Some are obvious like how big your house is while others might surprise you.

Here’s what really matters when figuring out how much you’ll pay:

#1 Total Linear Feet

This one’s pretty obvious, but it’s worth mentioning.

The more roofline you want covered, the more you’re going to pay.

Most contractors measure the perimeter of your roofline where you want the lights installed. If your roofline is straightforward with just a few peaks and turns, that keeps things cheaper.

But if it wraps around, has a bunch of angles, or includes back patios or garages, it adds up fast.

And while more feet = more money, some installers offer discounts for bigger jobs. So your per-foot cost might actually go down a little with larger installs.

Also Read: Is Uplighting Worth It?

#2 Home Complexity

Got a simple ranch house with clean rooflines? Lucky you.

Your installation is going to be way cheaper than your neighbor with the Victorian-style home that has more peaks and valleys than the Blue Ridge Mountains.

Complex rooflines mean more cuts, more connections, and more time for installation. Every corner, peak, and architectural detail adds to the labor cost. Multi-story homes require ladders, scaffolding, or even lifts in some cases.

So if your house has a lot of dormers, bay windows, or intricate trim work, expect to pay more.

It’s not just about the difficulty. It’s about the time it takes to do the job right.

#3 Type Of Trim Light System

There’s a wide range of trim light systems out there.

Some are basic, with limited colors and simple settings. Others are full-blown smart lighting setups with an app, scheduling, color-changing zones, and music syncing.

The fancier the tech, the higher the price.

Smart systems with tons of features cost more than standard ones that just turn on and off.

So if you want lights you can control from your phone, program for holidays, or animate for game day, expect to pay for that added functionality.

#4 Quality Of Materials

You can find cheap trim lights online for next to nothing. But you get what you pay for.

Factors That Affect The Cost Of Trim Lights

Quality materials matter, especially in Virginia where we deal with hot summers, cold winters, and plenty of moisture. Cheap lights might work fine for a year or two, but then you’re dealing with failures, color shifting, and water damage.

Also Read: Where To Place Landscape Lighting?

Higher-end lights are brighter, last longer, and hold up better to weather changes

Same goes for the channels or trim pieces they sit in. Aluminum mounting tracks look cleaner and last longer than plastic ones.

Also, better-quality systems usually come with longer warranties. That might not seem like a big deal at first, but it’s peace of mind down the road if anything fails.

#5 Installation Method

How your lights get installed makes a huge difference in cost.

There are basically three approaches:

  • Clip-on systems that attach to existing gutters or trim
  • Channel systems that require mounting tracks
  • Integrated systems that become part of your home’s architecture

Clip-on systems are the cheapest to install but might not look as clean. Channel systems offer the best appearance but require more labor. Integrated systems are the most expensive but give you that seamless, built-in look.

#6 Your Location

Since we’re talking about Virginia, your prices will reflect the general cost of labor in the area.

Some parts of the state like Northern Virginia or the more urban spots tend to be a little pricier than rural areas. Installers in cities often have more overhead, which can drive costs up.

Cities like Arlington, Alexandria, and Fairfax typically see higher prices than smaller towns. But you also have more contractors to choose from, which can create some competition and keep prices reasonable.

Also, some companies charge travel fees if you’re far from their usual service zone. It’s not always a huge bump, but it’s something to ask about.

#7 Power Source And Controls

This is the tech side of things, and it can also affect how much trim lights cost.

Most systems need a nearby outdoor outlet or hardwiring into an existing power source. If you’ve already got a good spot, great. If not, an electrician may need to install something, which adds to the total cost.

And depending on the control setup (manual switch, app-based, or connected to your smart home) there may be extra components involved.

The fancier the setup, the more you’ll pay. But also, the cooler it is to show off.

Bottom Line

You’re probably looking at spending somewhere between $3,000 and $7,000 for a full setup in Virginia. That number will swing depending on your house size, the system you choose, and a few other things we talked about.

If you’re serious about it, your best bet is to get a few quotes. Most companies will do a free estimate, and it gives you a good feel for what’s out there.

Trim lights aren’t exactly cheap, but they’re also not just a one-season deal. They add real curb appeal, make your life easier during the holidays, and they look awesome!

What Gauge Wire For Landscape Lighting? (Guide)

Thinking about lighting up your yard, garden, or walkway?

Low-voltage landscape lighting is a great way to add some serious curb appeal without breaking the bank. But before you run out and buy a bunch of lights, there’s one small detail that can make a huge difference: wire gauge.

It’s not the most exciting part of the project, but using the wrong wire size can cause problems like dim lights, power issues, or worse.

In this post, we’ll show you what gauge wire to use for landscape lighting.

Common Wire Gauges For Landscape Lighting

There are a few wire sizes people typically use for low-voltage landscape lighting.

You’ll mostly see 14 gauge, 12 gauge, and 10 gauge wires. The smaller the number, the thicker the wire. And thicker wire carries power more efficiently over longer distances.

Let’s take a look at each of these:

14 Gauge Wire

This one’s the lightest-duty wire of the bunch.

It’s fine for short runs, like under 50 feet, and for lower wattage lights. If you’re just powering a couple of path lights close to your transformer, 14 gauge might work just fine.

That said, don’t push it too hard. It’s not built for big setups or long distances. Use it only when your layout is small and simple.

Common Wire Gauges For Landscape Lighting

Also Read: How To Design Landscape Lighting

12 Gauge Wire

This is the go-to for most landscape lighting projects.

It’s a great middle-ground – flexible, easy to work with, and can handle a decent amount of wattage without losing voltage.

You can run up to 100 feet with this stuff in most cases, assuming your total wattage isn’t crazy high.

If you’re not sure where to start, start with 12-gauge. It’s the most popular choice for a reason. Strong enough for most jobs, but still affordable and easy to manage.

10 Gauge Wire

This is thick, durable, and perfect for long runs or high-powered lighting setups.

If you’ve got a long stretch of lights, or you’re stringing together a bunch of fixtures, 10-gauge keeps your system strong and consistent.

It costs more and it’s a little harder to bend and tuck into tight spots, but it’s worth it when your setup demands more power.

Also Read: Is Landscape Lighting Worth It?

How To Choose The Right Gauge For Your Project

Picking the right wire gauge isn’t complicated, but it does take a little planning.

The two main things to think about are how far your wire needs to run and how much power your lights will use.

The longer the run and the higher the wattage, the more power your wire has to carry. And thinner wires just can’t handle that as well as thicker ones.

Once you’ve added up the total wattage and measured the farthest distance from your transformer to the last light, use that info to pick your gauge.

There are plenty of wire gauge charts online that can give you an exact match, but a good rule of thumb is: short and simple setups can use thinner wire, and longer or more complex systems need thicker wire.

How To Choose The Right Gauge For Your Project

Why Voltage Drops Matter

Another thing you need to be aware of is voltage drops.

As electricity travels through a wire, a bit of it gets lost along the way. The longer the wire and the more power it’s moving, the more gets lost. That’s a voltage drop.

It means your 12-volt light might only be getting 10 volts by the time power reaches it.

When that happens, lights get dim. Sometimes they flicker. In worst-case scenarios, they might not turn on at all.

You don’t want to spend time installing everything only to find half your lights are underperforming.

Using the right gauge wire helps prevent that. Thicker wire keeps voltage drop to a minimum so all your lights shine bright and evenly – just like you planned.

Pro Tips For Running Landscape Lighting Wire

Once you’ve picked the right wire, it’s time to lay it out and hook everything up.

The actual install isn’t hard, but a few simple moves like the ones below can make your setup cleaner, more reliable, and easier to tweak later if needed:

  • Leave extra slack at each fixture so you can reposition lights later without needing to rewire everything.
  • Use waterproof connectors that seal out moisture and protect against corrosion.
  • Avoid unnecessary splices. Fewer connections means fewer things that can go wrong.
  • Bury the wire 6 to 12 inches deep to keep it safe from foot traffic, pets, and lawn equipment.

Also make sure to plan your layout before you dig. Walk it out and mark spots with flags or chalk.

Also Read: Where To Place Landscape Lighting?

Bottom Line

The gauge wire you choose has a big impact on how your landscape lighting performs.

Go too thin, and you’ll end up with dim or flickering lights. Go too thick, and you might spend a bit more – but your system will run strong and smooth.

In most cases, 12-gauge wire is the sweet spot, but for long runs or high-wattage setups, 10-gauge is the better move.

And if you’re working with a small, simple layout, 14-gauge might be just fine.

FAQs

Can I Mix Different Wire Gauges?

You can, but it’s not ideal. Mixing gauges can cause uneven voltage across your system.

If you have to do it (like extending an existing line) make sure the thicker wire is feeding into the thinner one, not the other way around.

Still, it’s better to keep things consistent whenever possible.

Does It Matter If I Go Thicker Than Needed?

No! Going thicker is totally fine. You’re just reducing the chance of voltage drop. It might cost a little more and be a bit bulkier to work with, but there’s no downside in terms of performance.

If anything, it gives you more wiggle room for adding lights later.

Is Stranded Or Solid Wire Better For Outdoor Lighting?

Stranded wire is usually the way to go for outdoor use. It’s more flexible, easier to pull through tight spots, and it handles movement better without breaking. Solid wire is stiffer and a little more fragile if bent repeatedly.

For landscape lighting, stranded wire just makes life easier.


Where To Place Landscape Lighting? (8 Great Ideas)

So, you’re thinking about landscape lighting—great choice! It’s an awesome way to make your outdoor space look amazing at night and really showcase your yard’s best features.

But with so many options, it can be tough to figure out the best spots to place your lights.

Don’t worry though! In this post, we’ll give you 8 solid ideas to help you decide where to place landscape lighting without overthinking it.

#1 Pathways And Walkways

One of the first places to think about lighting is your pathways and walkways.

You want to be able to see where you’re walking, right? Well, lights along these paths make it easy to navigate, especially if you’re walking around at night.

Plus, they create a warm, inviting atmosphere.

You can use small, low-to-the-ground lights or even go for some cool stake lights to line your path. They don’t have to be super bright, just enough to guide you safely from one spot to another.

This doesn’t just look nice; it adds safety too. No one wants to trip over a rock or uneven ground in the dark. Pathway lighting is a smart, practical choice.

Also Read: How To Design Landscape Lighting

#2 Entrances

Your front door is the first thing people see when they come to visit, so why not light it up?

Well-placed lighting around your entrance helps make your house feel extra welcoming. It gives that “come on in” vibe that makes guests feel at home and adds some charm to your entryway.

Plus, it’s perfect for making your home stand out from the street.

For this, you can use lights like sconces on either side of the door or a cool pendant light hanging above.

Just make sure the lighting is warm and soft. Harsh, bright lights can feel a little too intense, while soft lighting creates a cozy atmosphere that invites people to stay a little longer.

#3 Trees And Plants

Lighting trees and plants is like turning your garden into a piece of art.

It’s not all about function here; it’s about creating a mood. When you light up trees, shrubs, or plants, you get a cool effect where shadows play against the leaves and branches. It makes your backyard look magical, almost like a fairy tale.

Try using spotlights to shine upward and highlight the trunks of larger trees. For smaller plants, you can opt for ground-level lights that create a softer, diffused glow.

It’s a simple trick that makes everything look more dramatic without being over the top.

Also Read: Is Uplighting Worth It?

#4 Decks, Patios, And Stairs

If you love hanging out on your deck or patio, lighting is a must to keep the vibe going after dark. You don’t want to end the party just because the sun went down, right?

Lighting around your outdoor hangout areas keeps things safe and stylish.

Plus, it’s an awesome way to create a cozy, intimate setting when you’re hosting friends or just chilling with family.

You can install lights along the deck’s edge, under the steps, or even built into the railing.

You can even go for string lights above your deck for a relaxed, festive vibe.

Stairs are another spot where lights are super helpful. Step lights are great for preventing accidents and creating a cool effect that adds a little extra flair to your outdoor space.

#5 Driveways

Your driveway is another place to consider when planning where to put landscape lights.

You don’t need to go overboard, but a little lighting along your driveway can help guide guests and drivers at night. Plus, it gives your home a more polished look.

You could use low lights along the edges of your driveway, or even mount some wall lights on fences or walls nearby. This keeps your driveway well-lit and adds a little security, which is always a good thing.

If you have a long driveway, try putting lights every few feet to create a nice even glow.

Just remember to keep the lights soft and subtle so they don’t blind you when you’re pulling in.

#6 Architectural Features

Got a gorgeous stone facade? Beautiful columns? Unique window details? Show them off!

Architectural features can look even more stunning when they’re lit up properly. Plus, lighting these parts of your home helps bring out the character and personality of your space.

You can use floodlights to highlight larger features, like big walls or columns. For smaller details, like window frames or a cool door, accent lights or spotlights work well.

Just make sure the lights focus on the best parts, and remember, less is more.

A subtle light will add depth without taking away from the charm of the architecture itself.

Also Read: How Much Does Landscape Lighting Cost?

#7 Outdoor Structures

Do you have a gazebo, pergola, or trellis in your backyard?

Lighting these can completely change the way your backyard looks at night! These structures are already great focal points, but with some landscape lights, they can become the center of attention after dark.

String lights, pendant lights, or even small lanterns can add a warm, inviting glow to them.

For a more dramatic effect, consider uplighting on the posts of your gazebo or trellis.

It’s a great way to bring out the structure’s design and create an ambiance perfect for those evening hangouts or dinners outside.

If you’re using the space for entertainment, lighting can also help set the scene for fun evenings under the stars.

#8 Water Features

Got a pond, fountain, or pool? You’ve got to light it up!

Water features are stunning on their own, but lighting them at night makes them magical.

Just imagine the soft light reflecting off the water while you sit outside, sipping a drink, and listening to the sound of flowing water!

For ponds or fountains, submersible lights work perfectly. They add a soft, glowing reflection to the water that looks super peaceful and inviting. For pools, LED lights work great. Not only do they light up the water, but they also make the surrounding area feel like a resort.

That said, be mindful of how much light you use. You want the lights to complement the water’s movement, not overpower it.

Bottom Line

There you have it – eight awesome ideas for where to place landscape lighting.

Now it’s your turn to get creative with your outdoor lighting. You’ve got the ideas—now it’s time to make them shine!

You don’t have to do everything at once. Start with one or two areas that matter most to you, then build from there. Before you know it, your yard will transform into a nighttime oasis that’s as functional as it is beautiful.

How To Design Landscape Lighting (Guide)

So, you’ve decided to spruce up your outdoor space with some landscape lighting?

Great choice! A well-lit yard doesn’t just look great—it makes your home safer, more inviting, and way more functional after the sun goes down.

But where do you even start? Don’t worry, we’re here to help!

In this post, we’ll show you how to design landscape lighting that looks amazing and practical.

#1 Pick The Spots You Want To Light Up

The first thing to think about when planning your landscape lighting is what you want to highlight. You don’t have to light up the whole yard, just the parts that are important or look best at night.

Maybe it’s your front door, so guests can find their way easily. Or maybe it’s that gorgeous tree in your backyard that deserves to be the star of the show.

Walk around your property at night and think about what catches your eye.

Is there a pathway that could use some guidance lights? A garden bed that needs a little glow?

Start jotting these ideas down.

Once you’ve figured that out, consider how you want those spots to feel. Do you want your backyard to feel welcoming and warm, or do you prefer something more dramatic and spotlighted?

These decisions can help guide the type of lighting you use later on.

Also Read: Where to place landscape lighting?

#2 Choose The Right Type Of Lighting

Now comes the fun part: picking the right type of lighting.

There are a few main types of landscape lighting, and each has a different effect on your space:

  • Ambient lighting creates a soft, overall glow, perfect for general lighting in your yard.
  • Task lighting is focused and helps you see specific areas, like pathways or grilling spots.
  • Accent lighting draws attention to specific features, like trees, statues, or water fountains.
  • Decorative lighting can be anything fun or whimsical, like string lights or lanterns. They add personality and charm.

The important thing here is balance. Too much of one type can make things feel overdone or too dark in places. It’s like creating the perfect playlist – you want a good mix.

#3 Pick Out The Best Fixtures

Landscape Lighting Solar Lamp Surrounded By Plants And Foliage

Once you know what kind of lighting you need, it’s time to pick the right fixtures.

You want something that matches your space and your goals.

For example, if you’re lighting up a pathway, you might go with low-voltage pathway lights. If you’ve got a tree to highlight, a spot light might work best.

Fixtures come in different finishes, like bronze, stainless steel, or plastic. Make sure you choose materials that can withstand the weather in your area. You don’t want your lights to rust or fade after one season.

We recommend fixtures that are rated for outdoor use and have a waterproof rating. The last thing you want is to spend time and money on lights that stop working after a few rainstorms.

Also, don’t forget to think about the height and angle of your fixtures.

You want the light to fall exactly where you want it. This can take a little testing and adjusting, but trust me, it’s worth it when you see the effect you’re going for.

Also Read: Is Landscape Lighting Worth It?

#4 Map Out Your Lighting Plan

Now that you’ve got a rough idea of what you want, it’s time to put it all together.

Grab a piece of paper (or your phone) and sketch out a simple map of your yard. Mark where you want to place each light and what type it’ll be.

This step might feel a little tedious, but trust me, it’s worth it.

Having a plan helps you avoid mistakes like buying too many lights or ending up with uneven coverage. It also makes installation way easier. If you’re working with a professional, this map will help them understand exactly what you’re envisioning.

Plus, it’s satisfying to see everything laid out in front of you. Like a treasure map, but for awesome lighting.

Some Tips For Mapping The Lights

Make sure to space the lights far enough apart that they’re not too bright or dim, and try to keep them in places where they won’t be tripping hazards. If you’ve got a long driveway, for example, you can place lights along the edges for safety, but don’t overdo it.

A good rule of thumb is to place lights where they’ll add to the atmosphere without drawing attention to the lights themselves.

You don’t want the fixtures to steal the show – they’re just there to enhance the space.

#5 Think About Practical Stuff

Landscape Lighting Beautiful Garden Illuminated At Nigh

It’s easy to get caught up in making your landscape look amazing, but don’t forget about the practical stuff like:

How are you going to power all these lights?

Are you running electrical wires or using solar-powered lights?

If you’re going with electrical lighting, you’ll need to make sure you have a safe, weatherproof outlet or transformer. If you’re not comfortable dealing with electrical work, it’s a good idea to hire an electrician to help you out.

On the other hand, solar lights are easy to install and don’t need any wiring. The downside is that they can be a little less powerful than electric lights, and they rely on sunlight to charge during the day.

So, if your yard has lots of shade, solar lights might not be the best option.

You’ll also want to think about the placement of the lights in relation to where you’re getting your power source. The last thing you want is a tangled mess of wires running across your yard.

Take time to plan your wiring system or solar light placements so everything stays neat and functional.

Also Read: How Much Does Landscape Lighting Cost?

#6 Incorporate Control Systems

A control system is a great addition to your landscape lighting.

There are lots of smart lighting systems available these days that allow you to control your outdoor lights with your phone or even with voice commands.

Imagine being able to adjust your garden lights without leaving the couch!

Another option is using timers.

Timers are a simple way to set your lights to turn on and off automatically. This can save you energy and help create a consistent lighting schedule, which is especially useful if you’re not home every evening.

If you really want to get fancy, you can even set up different lighting scenes. For example, a bright light setup for when you’re having a party, or soft, subtle lights for a quiet evening outside.

#7 Watch Out For Light Pollution

Lighting is great but there’s a balance to strike.

Over-lighting your yard or using lights that spill into the sky can contribute to light pollution.

This is when excess light interferes with the natural darkness of the night sky, which can disrupt wildlife and even affect your sleep patterns.

To avoid this, make sure your lights are directed exactly where you want them, not spilling all over the place. Shielded fixtures can help with this, and be mindful of the brightness of your lights. You don’t need a stadium’s worth of light in your yard.

A subtle, well-placed glow is all you need for a magical effect.

#8 Keep Maintenance In Mind

Like any part of your home, landscape lighting needs some TLC.

It’s important to clean the fixtures regularly and check that all the bulbs are working. Over time, the lenses can get cloudy, and dirt can build up on the lights, reducing their effectiveness.

A little cleaning once a season can keep everything looking fresh.

Also, make sure to check the wiring (if you’re using electric lights) for any damage or wear and tear. Outdoor lighting can last for a long time, but you may need to replace bulbs or fix a light fixture here and there.

If you’re using solar lights, make sure the solar panels are clean and get enough sunlight.

Wrapping Up

And there you have it – everything you need to design a killer landscape lighting setup.

Start by picking the spots you want to highlight, then choose the right type of lighting and fixtures for each area. Map out your plan, think about practical details, and incorporate smart controls if you’re into that.

Be mindful of light pollution, and don’t forget to factor in maintenance.

Take your time with each step, and don’t stress too much.

Once you’re done, grab a drink, sit back, and enjoy the view. Your yard is about to become your new favorite hangout spot.

Is Landscape Lighting Worth It? (Here’s Why It Is!) 

Thinking about adding some landscape lighting to your yard but wondering if it’s really worth it? 

We get it. It’s an investment, and like any investment, you want to know you’re getting your money’s worth. Sure, it might seem like just another home upgrade at first glance – something nice to have but not totally necessary. 

But here’s the thing: landscape lighting is SO much more than just a pretty addition.

In this post, we’ll break down exactly why landscape lighting is totally worth it.

#1 It Makes Your Home Look Amazing

Let’s start with the obvious – landscape lighting makes your home look SO good at night.  

Think about it. During the day, your house might look nice, but at night? Without lighting, it just kind of fades into the background. 

Adding some well-placed lights can highlight the best features of your home.

For example, you can use uplights to show off trees or architectural details like columns or textured walls. Pathway lights can guide the eye along walkways and create a warm, inviting vibe. 

And don’t forget about accent lights—they’re perfect for showing off flower beds, water features, or even sculptures if you’re fancy like that.

The best part? You don’t need to go overboard. 

A few strategically placed lights can make a huge difference. Trust us, when you pull into your driveway at night and see your home lit up beautifully, you’ll feel like you’re living in a magazine spread.

Also Read: How Much Does Landscape Lighting Cost In Virginia?

#2 It Enhances Your Home’s Security

Now, let’s talk about something practical: security. 

A well-lit yard makes it harder for anyone with bad intentions to lurk around unnoticed. Intruders prefer darkness because it gives them cover. Take that away, and they’re less likely to stick around.

Motion-sensor lights are a great option here. They turn on automatically when someone approaches, which can startle potential intruders and alert you to movement. 

Plus, they save energy since they’re not on all the time. 

Floodlights are another solid choice if you want to keep larger areas visible.

Even if no one ever tries to break in, the added layer of security gives you peace of mind. You’ll feel safer knowing your home is well-lit and less vulnerable.

#3 It Helps Prevent Accidents

Accidents happen all the time, especially when you’re walking outside at night. 

Ever tripped over something you didn’t see? Yeah, not fun.

Landscape lighting is a simple way to avoid these mishaps. Here are a few spots where lighting can really make a difference:

  • Stairs and steps
  • Walkways and pathways
  • Driveways
  • Pool areas

It’s not just for your safety, either. If you have guests over, it’s nice to know they won’t trip on their way to the front door. 

Plus, if you’re the type to enjoy late-night strolls in your yard or garden, lighting can make it way more enjoyable (and less dangerous).

Also Check Out Our: Residential Landscape Lighting Services

#4 It Extends Your Outdoor Living Time

Dining Under Lights Is Landscape Lighting Worth It | Gps: 38.784532, 77.432176

Outdoor living is one of those things that most people love but can’t always enjoy to its full potential.

If you’ve ever wanted to sit outside and chat or enjoy a meal after the sun goes down, landscape lighting can make that possible. Imagine hanging out in your backyard with the perfect, soft glow of lights around you. It makes everything feel cozy and chill.

With landscape lighting, you can entertain, relax, or even work outside well into the evening. 

It’s not just about the looks; it’s about turning your yard into an actual space you can use more often, regardless of the time of day.

#5 It Adds Value to Your Property

Who doesn’t love an upgrade that adds value to your home? 

While landscape lighting isn’t going to raise your property value by the same amount as a full-on kitchen renovation, it can still make a difference. 

When buyers see a beautifully lit yard, they might be more inclined to picture themselves living in that space. It gives off a vibe of luxury and care, which can absolutely make your home stand out from others.

Plus, it’s an upgrade that’s not too expensive compared to other home improvements. 

So, if you’re thinking of selling down the road, you’ll have a better shot at a quicker sale with an extra “wow” factor.

#6 It Sets the Perfect Atmosphere

One of the most subtle yet powerful reasons to consider landscape lighting is the atmosphere it creates. Lights have a magical way of setting a mood, right? 

A warm, ambient glow in your yard can make it feel like an intimate escape. 

You could use different types of lighting for different vibes – soft and romantic for a cozy dinner outdoors, or bright and fun for a party.

Lighting can transform your outdoor space into whatever you want it to be. Plus, when your home looks gorgeous at night, it’s hard not to feel a little proud every time you come home!

When Landscape Lighting Might NOT Be Worth It

As much as we’ve been singing its praises, landscape lighting isn’t for everyone. There are a few reasons why you might want to hold off on installing it. 

Also Read: Is Uplighting Worth It?

Consider these points before making the decision:

  • If you’re on a tight budget and need to prioritize other home improvements first, landscape lighting might not be the best choice.
  • If you live in an area with a lot of light pollution, it might not have the impact you expect.
  • If your outdoor space is small or minimal, you may not get enough value from the lighting to justify the cost.
  • If you don’t like maintenance, the upkeep of lighting fixtures could become a hassle.
  • If you’re renting and don’t plan on staying long-term, it might not make sense to invest in permanent lighting.

Wrapping Up

So, is landscape lighting worth it? For most people, absolutely.

Sure, there are a few cases where it might not be the best fit, but for the majority of homeowners, the pros far outweigh the cons. Plus, you don’t have to go all-in right away. Start small, experiment with different styles, and build up over time.


At the end of the day, your home should be a place you love coming back to. And if a little lighting can make it feel warmer, safer, and more inviting, why not give it a shot? 

Trust me, once you see your yard glowing at night, you’ll wonder how you ever lived without it.